Cheesecake Factory Air Fryer Fried Macaroni and Cheese Balls
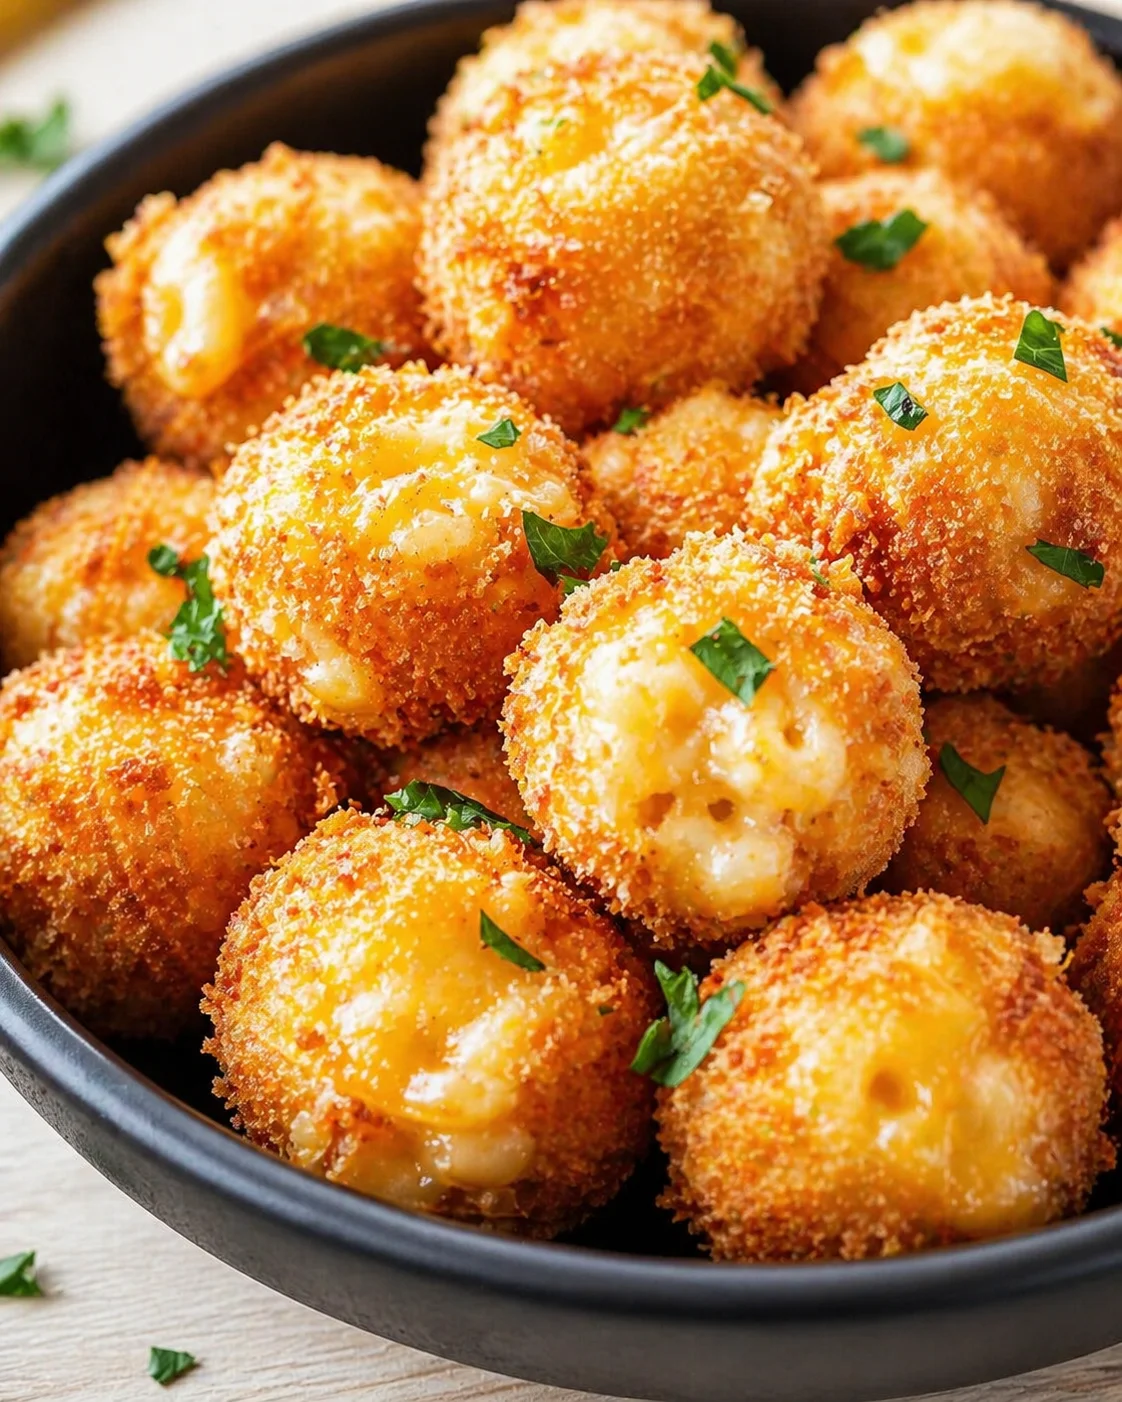
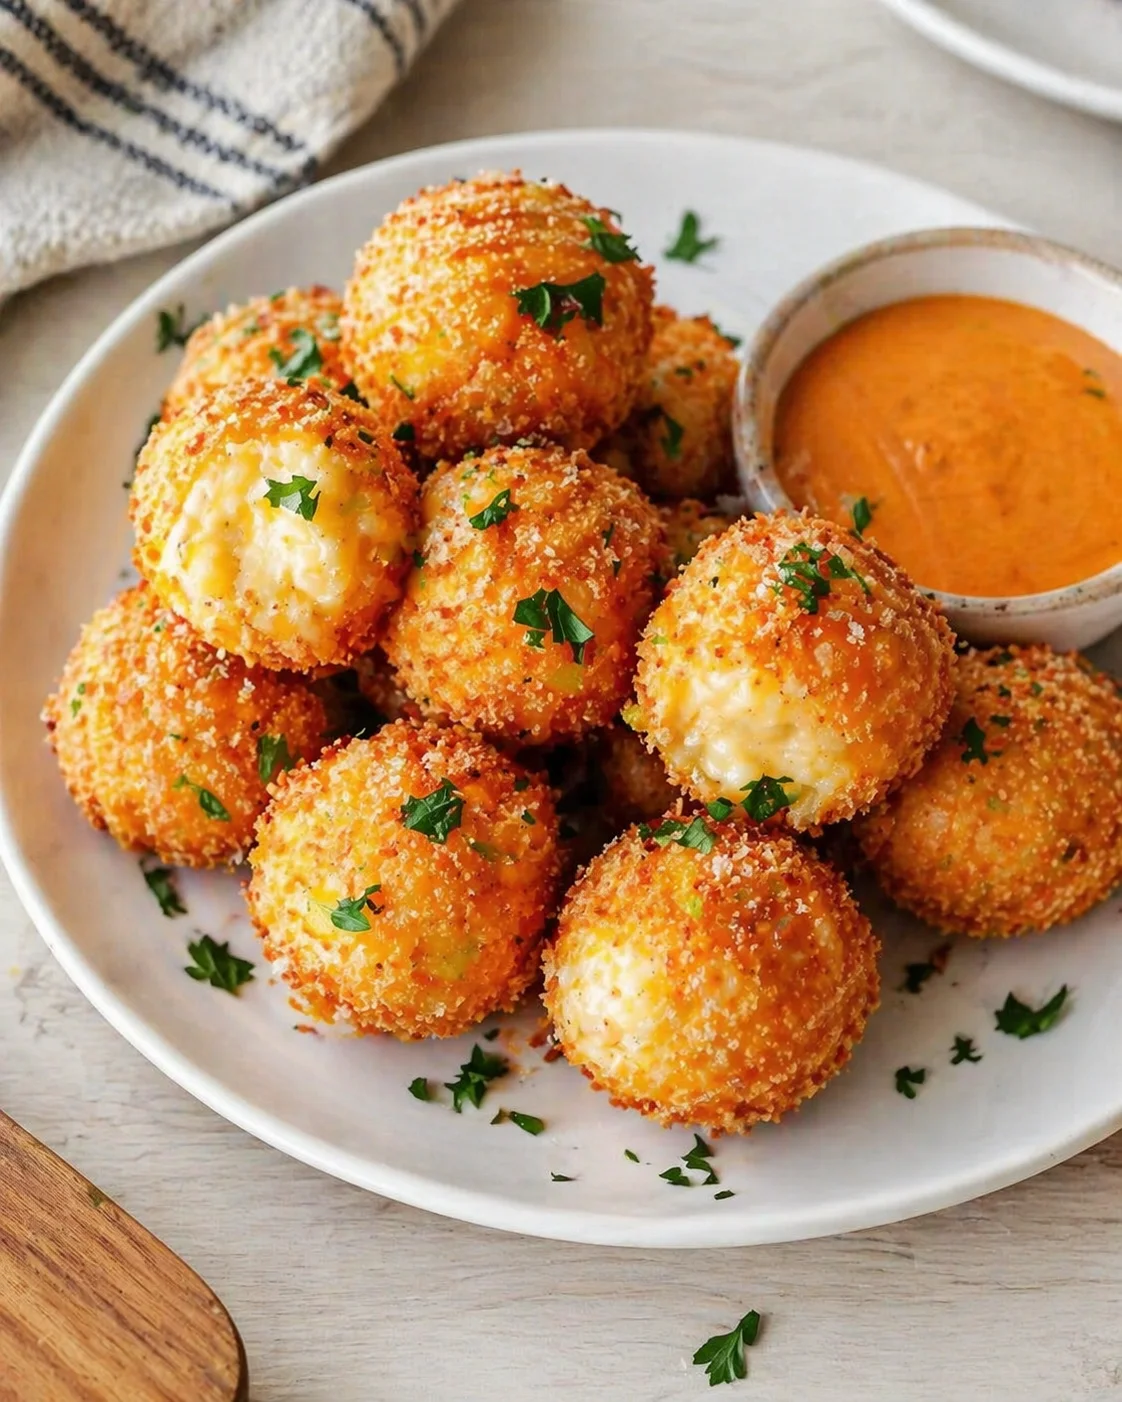
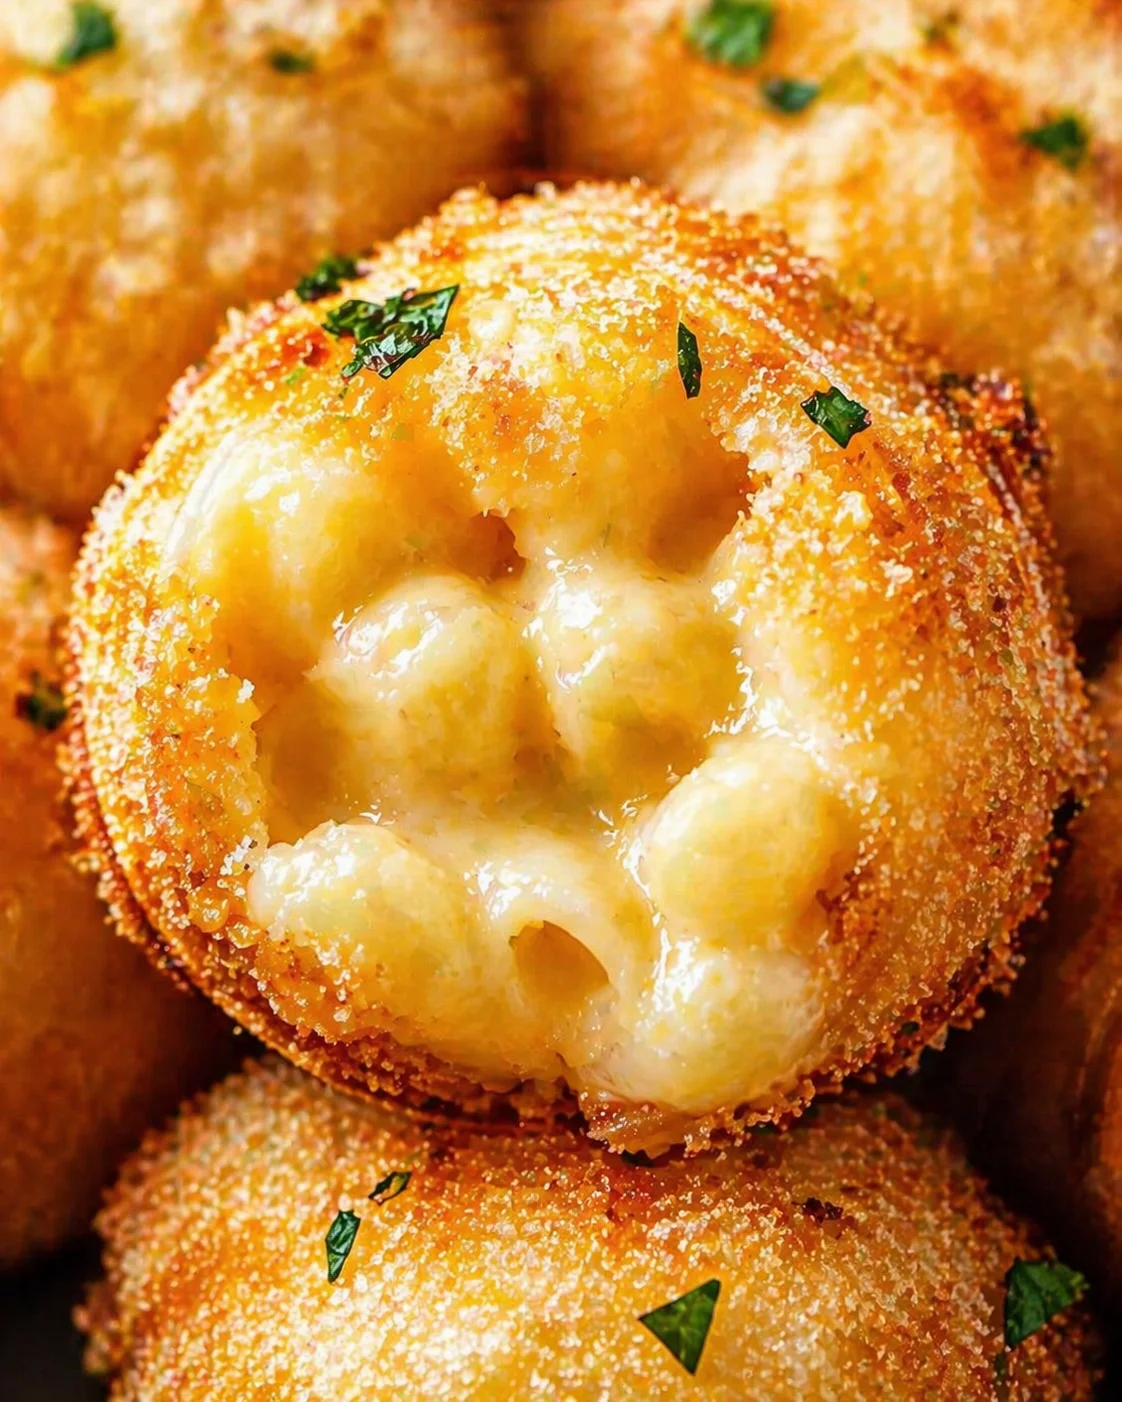
That crispy golden outside gives way to a creamy, melty center that feels like a warm hug in every bite. These Cheesecake Factory Air Fryer Fried Macaroni and Cheese Balls are a total crowd-pleaser—each one a perfect little party of cheesy comfort. Thanks to the air fryer, the outside gets that incredible crunch without the heavy greasiness of deep frying, locking in all the buttery, cheesy goodness inside. The contrast between the crispy shell and smooth, gooey filling is pure magic—a combo you won’t want to forget anytime soon.
What really makes me smile about these mac and cheese balls is how they reinvent your favorite comfort food into fun bite-sized snacks. Plus, using the air fryer keeps them lighter, so you can enjoy a few more without the guilt. And since you can whip these up at home, you don’t have to wait for a restaurant craving to hit—you can satisfy that cheesy desire anytime!
Feel free to jazz these up with a pinch of smoked paprika or a splash of hot sauce mixed right into the filling. They’re absolutely perfect for parties, a unique side dish, or an appetizer that’ll have your guests asking for more. Seriously, once you try these, your air fryer will be your new best friend.
Crunchy outside, soft inside, loaded with cheesy, buttery flavor—these Air Fryer Fried Macaroni and Cheese Balls inspired by The Cheesecake Factory are comfort food at its finest. Every forkful is pure joy, with that golden, crispy finish you crave!
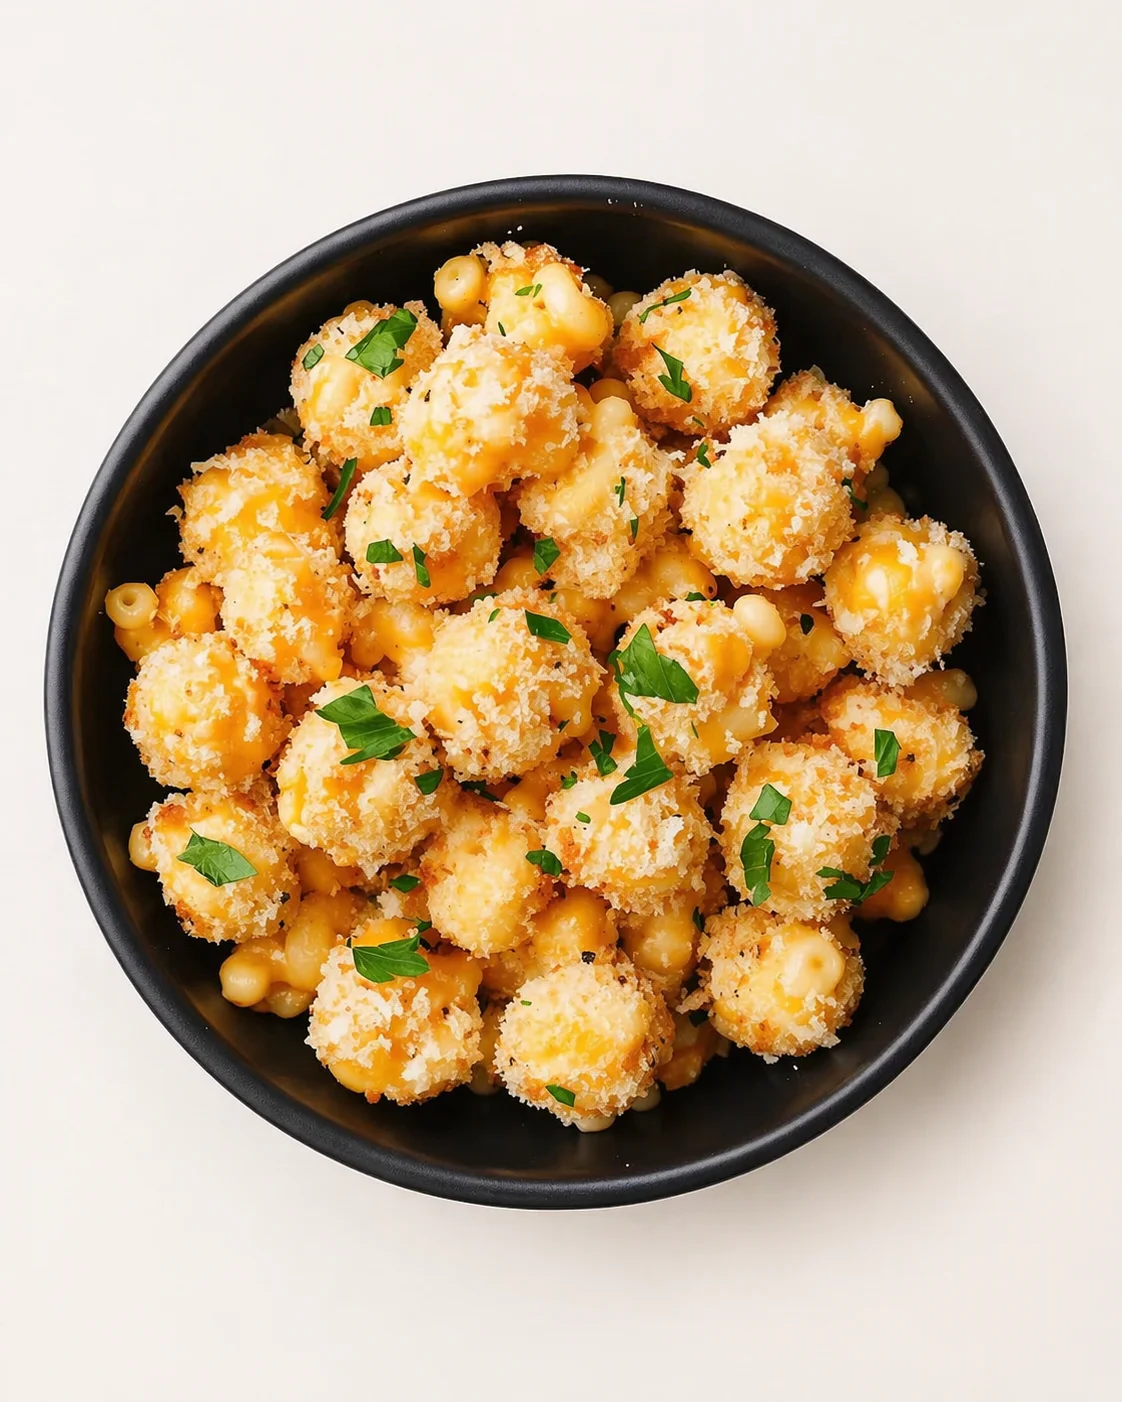
Picture biting into a little golden ball that bursts with creamy, melty macaroni and cheese—sounds like heaven, right? That’s exactly what these Cheesecake Factory Air Fryer Fried Macaroni and Cheese Balls bring to your plate. They take that classic comfort food we all love and shrink it down to crunchy, bite-sized perfection, all while using the air fryer to keep them lighter and less greasy than traditional frying.
In this recipe, I’ll walk you through every easy step to make these at home. You’ll start with a simple, smooth cheese sauce made on a roux, fold in tender elbow macaroni, and mix in mozzarella and Parmesan for extra gooeyness. Once chilled, shape them into balls, coat in a crispy breadcrumb and panko mix, and air fry until golden brown. Whether you’re feeding the family or bringing a snack to a party, this recipe makes the process fun and manageable.
Keep reading for a detailed ingredient list, easy-to-follow steps, helpful tips for success, delicious serving ideas, and advice on how to store and reheat leftovers. This recipe usually makes about 8 to 12 medium-sized mac and cheese balls, but feel free to double or triple it if you’re hosting a crowd!
What Makes Them Irresistible
Here’s why you’ll absolutely fall in love with these Cheesecake Factory Air Fryer Fried Macaroni and Cheese Balls—they’re crispy, cheesy bites of comfort that you just can’t resist. They turn classic mac and cheese into something playful and super snackable, plus the air fryer version is lighter and cleaner than deep-frying. For another crispy air-fried appetizer, try these Air Fryer Cream Cheese Wontons.
And the best part? You can make them your own! Add some spice with hot sauce or smoked paprika inside the cheese mixture, serve with marinara or ranch dipping sauces, or pair them with a fresh salad like this Cucumber Strawberry Salad to cut through all that richness. No matter what you pick, you’re in for a treat.
Essential Ingredients Explained
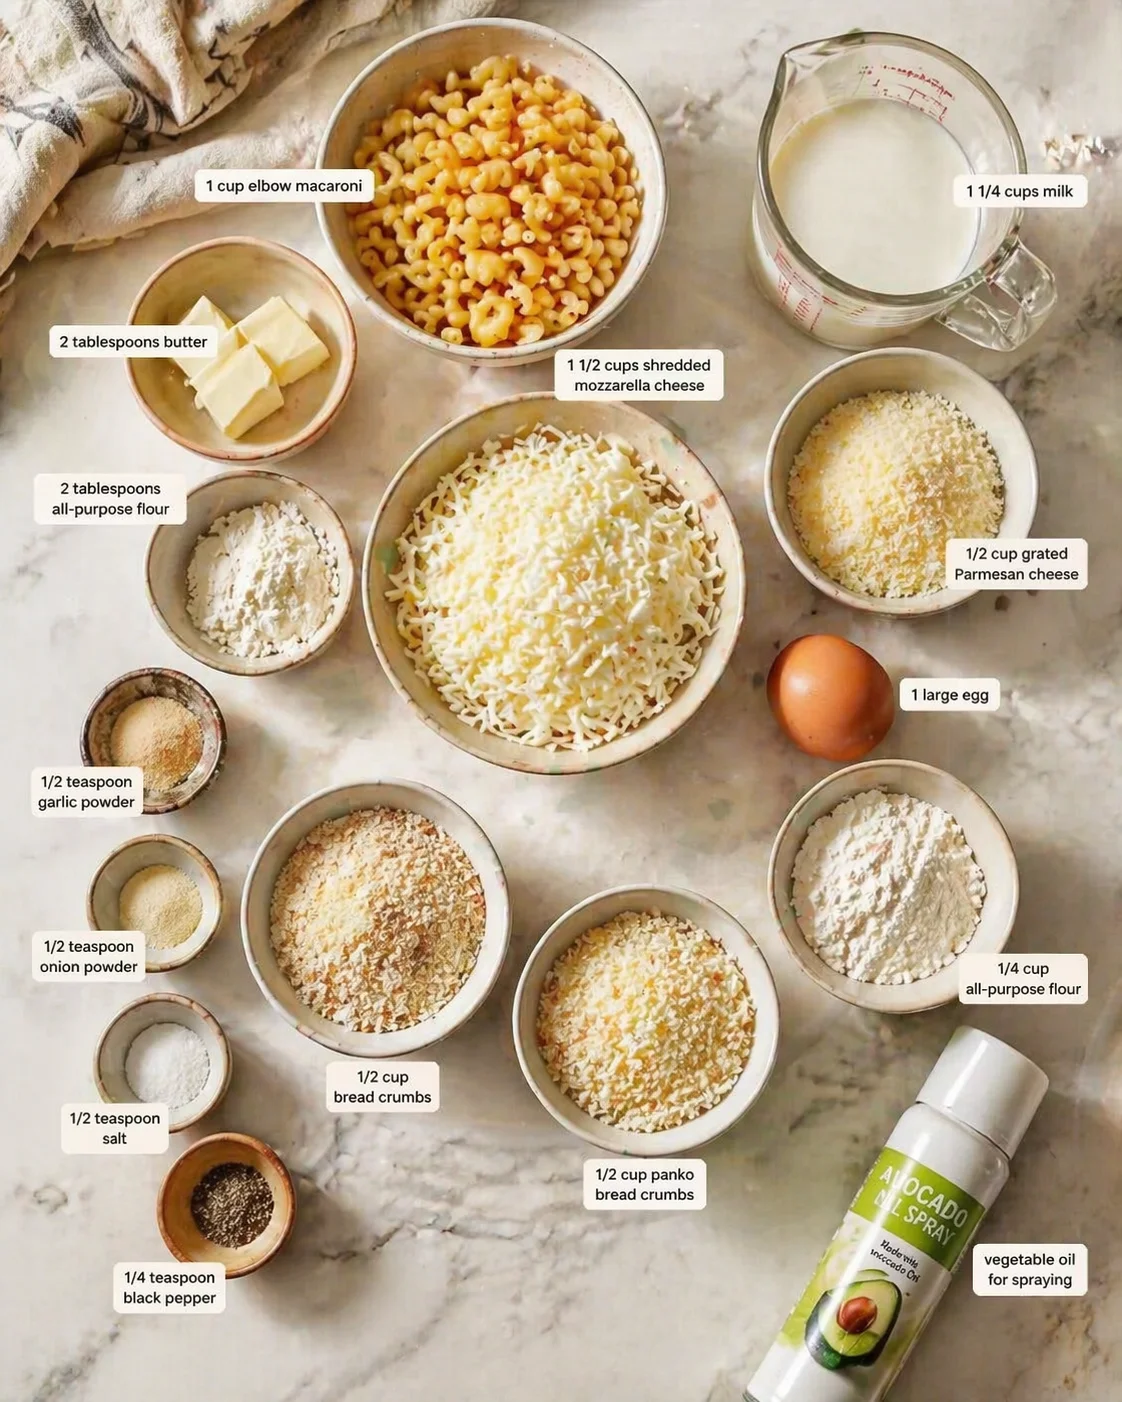
- 1 cup elbow macaroni
- 2 tablespoons butter
- 2 tablespoons all-purpose flour
- 1 1/4 cups milk
- 1/2 teaspoon garlic powder
- 1/2 teaspoon onion powder
- 1/2 teaspoon salt
- 1/4 teaspoon black pepper
- 1 1/2 cups shredded mozzarella cheese
- 1/2 cup grated Parmesan cheese
- 1 large egg
- 1/2 cup bread crumbs
- 1/2 cup panko bread crumbs
- 1/4 cup all-purpose flour
- Vegetable oil for spraying
Step-by-Step Preparation
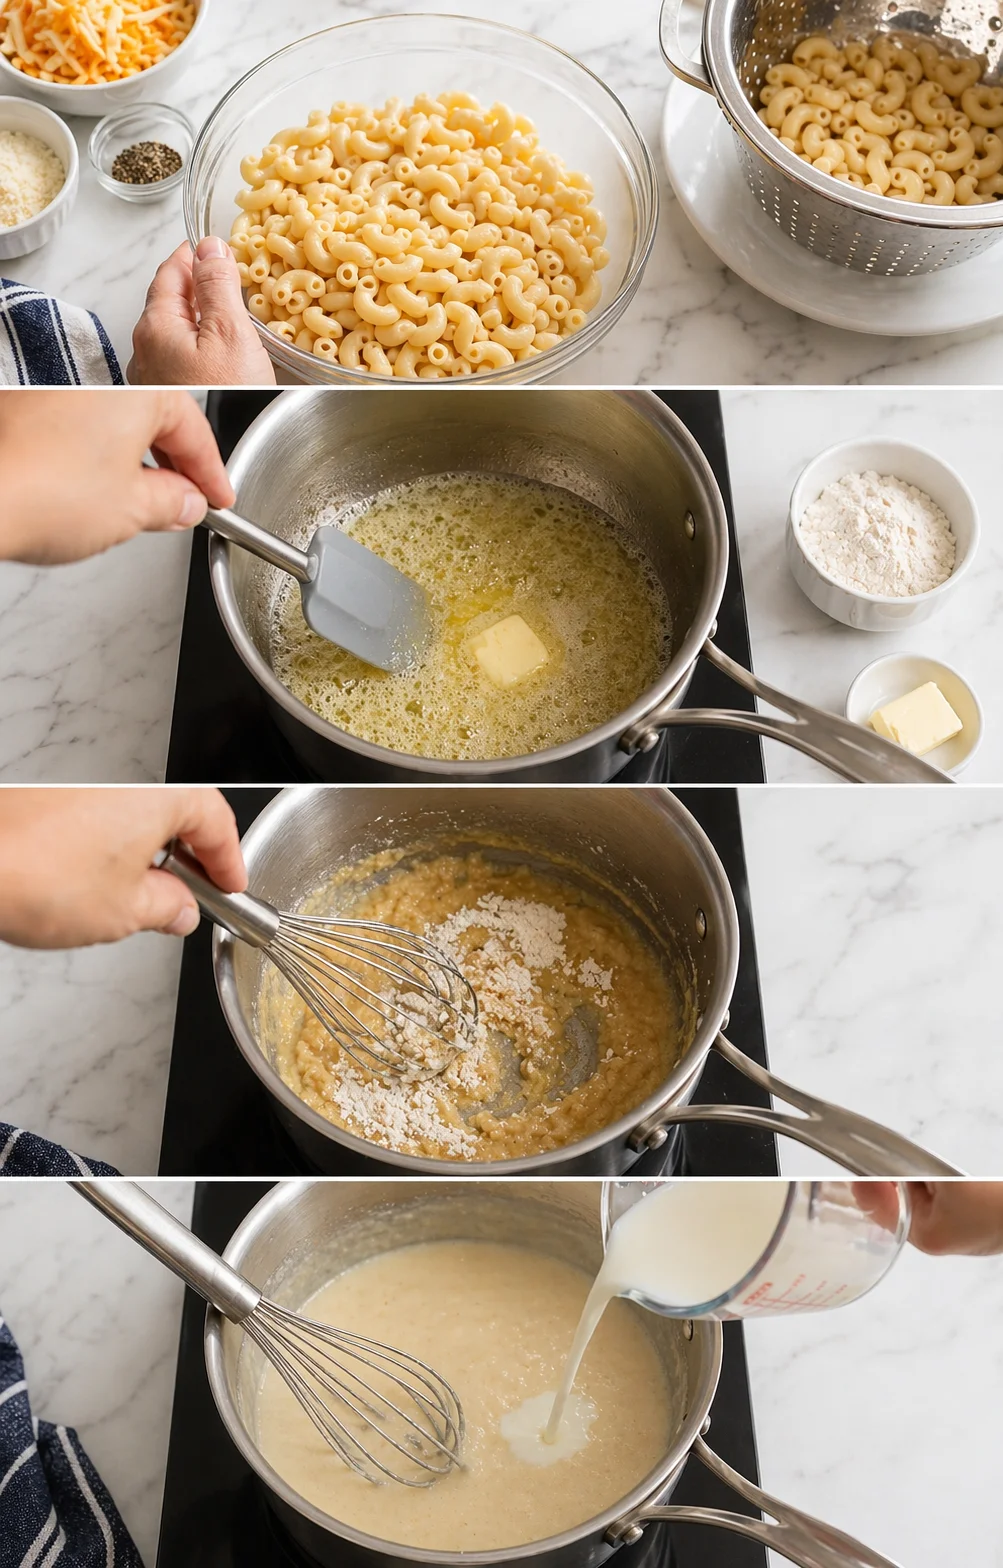
- Cook elbow macaroni according to package directions until al dente; drain and set aside.
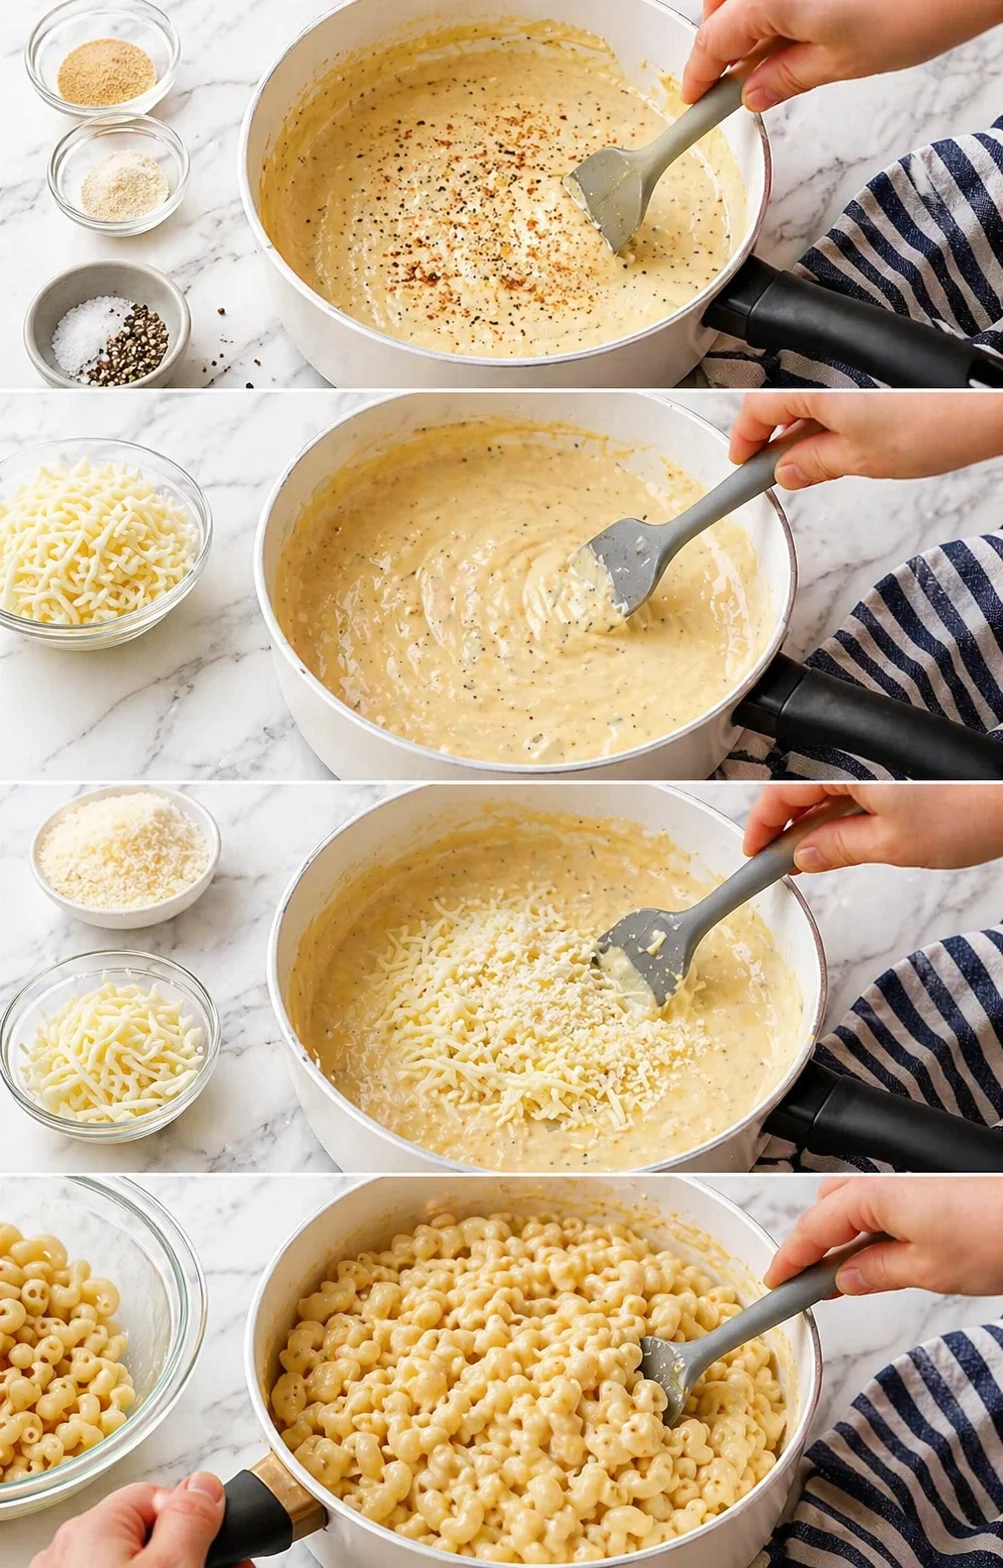
- Melt butter in a medium saucepan over medium heat until bubbly.
- Sprinkle in the all-purpose flour and whisk continuously for 1–2 minutes to form a smooth roux.
-
Slowly add the milk little by little while whisking constantly to prevent lumps.
- Stir in garlic powder, onion powder, salt, and black pepper until evenly blended.
- Let the sauce gently simmer 3–4 minutes until slightly thickened.
- Stir in shredded mozzarella and grated Parmesan until fully melted and the sauce is smooth.
-
Remove the pan from heat and fold in the cooked macaroni until evenly coated.
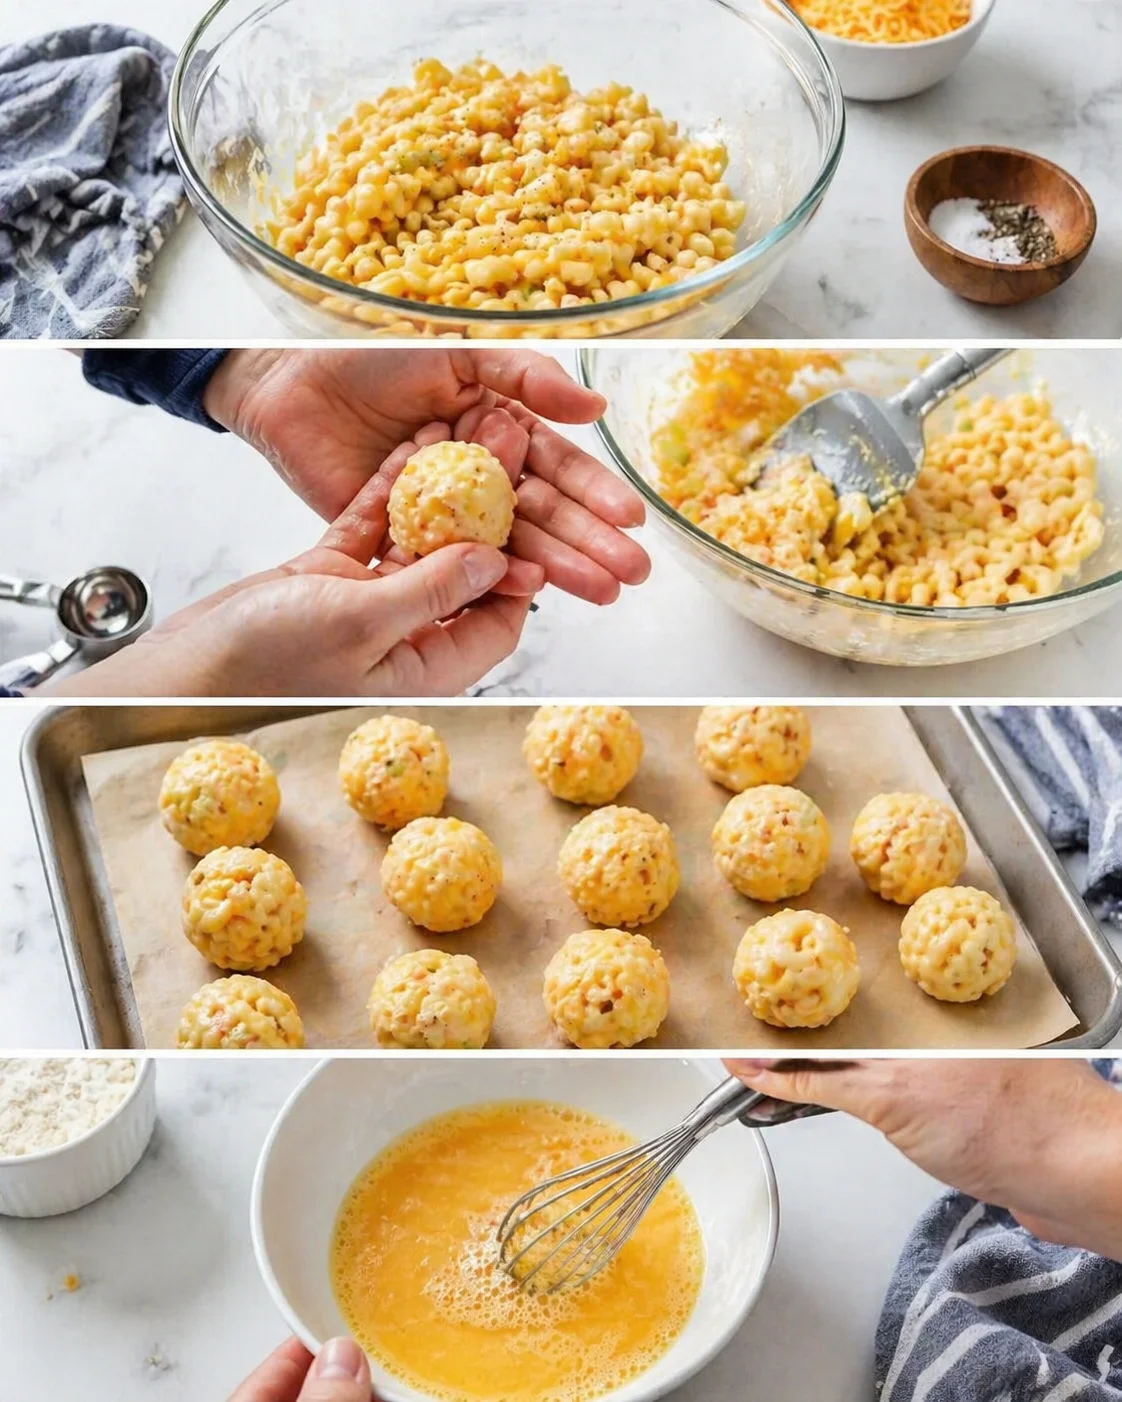
- Let the macaroni and cheese mixture cool 15–20 minutes to firm up for shaping.
- Scoop small portions and roll them into neat balls by hand.
- Place the formed balls on a parchment-lined baking sheet or a clean plate.
-
Beat the large egg in a shallow bowl.
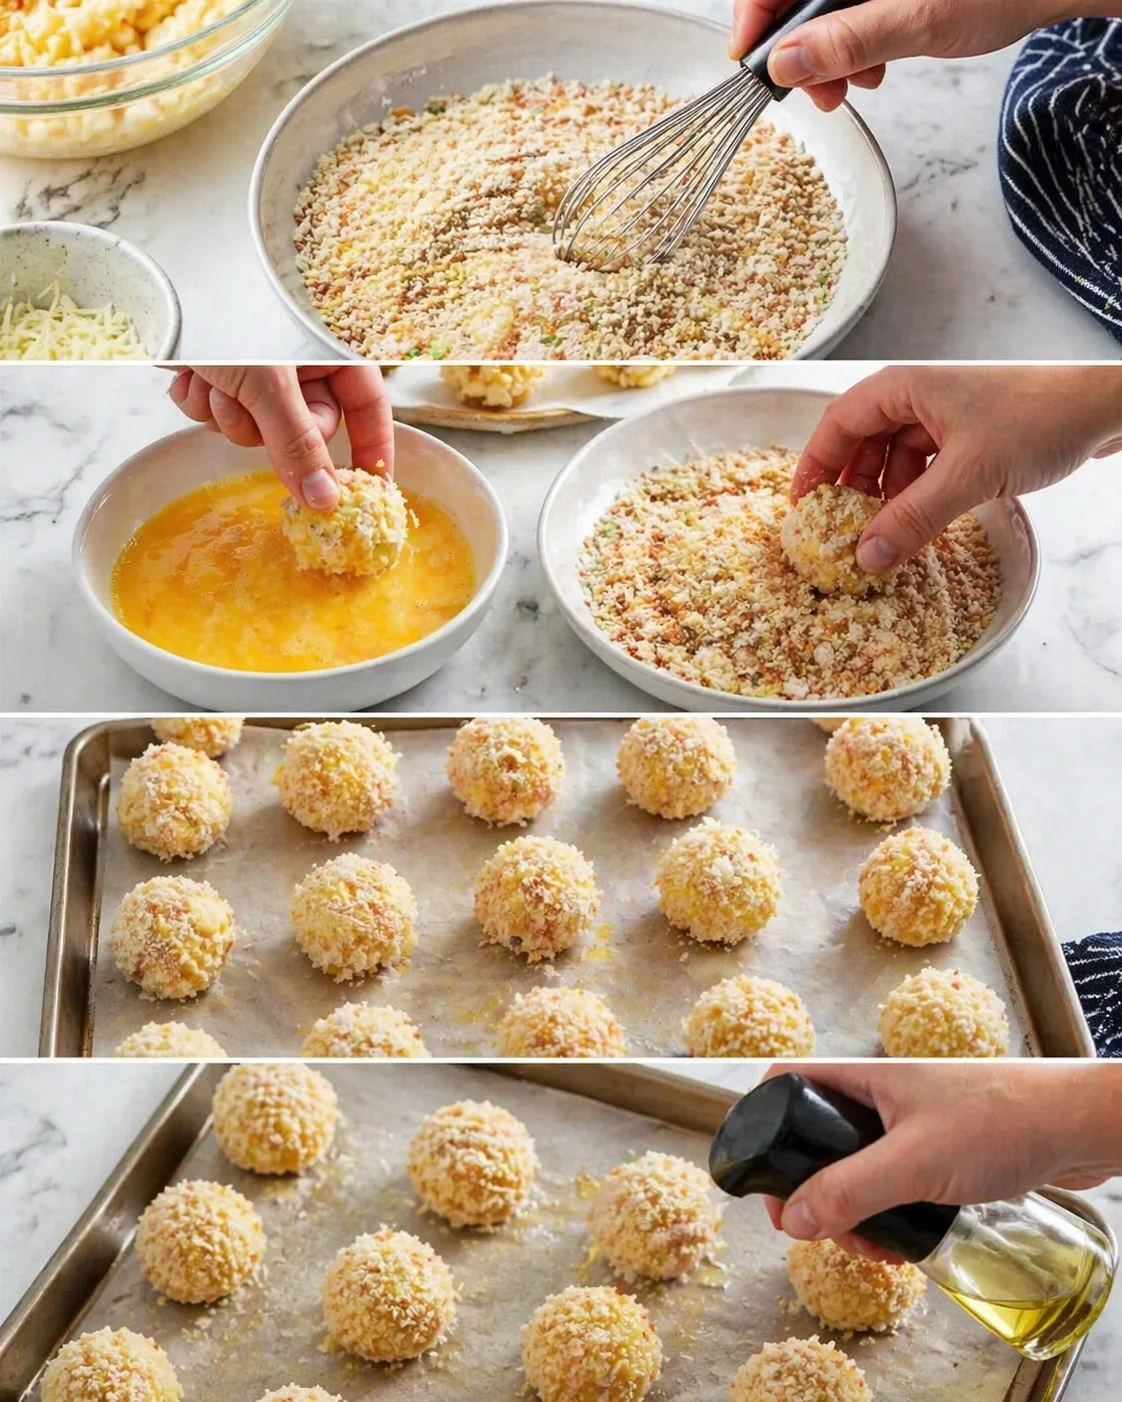
- Combine the bread crumbs and panko bread crumbs in another shallow dish.
- Dip each macaroni ball in the beaten egg, then dredge thoroughly in the breadcrumb mixture, pressing gently to adhere.
- Arrange the breaded balls on the lined baking sheet, spaced apart.
-
Lightly spray each ball with vegetable oil.
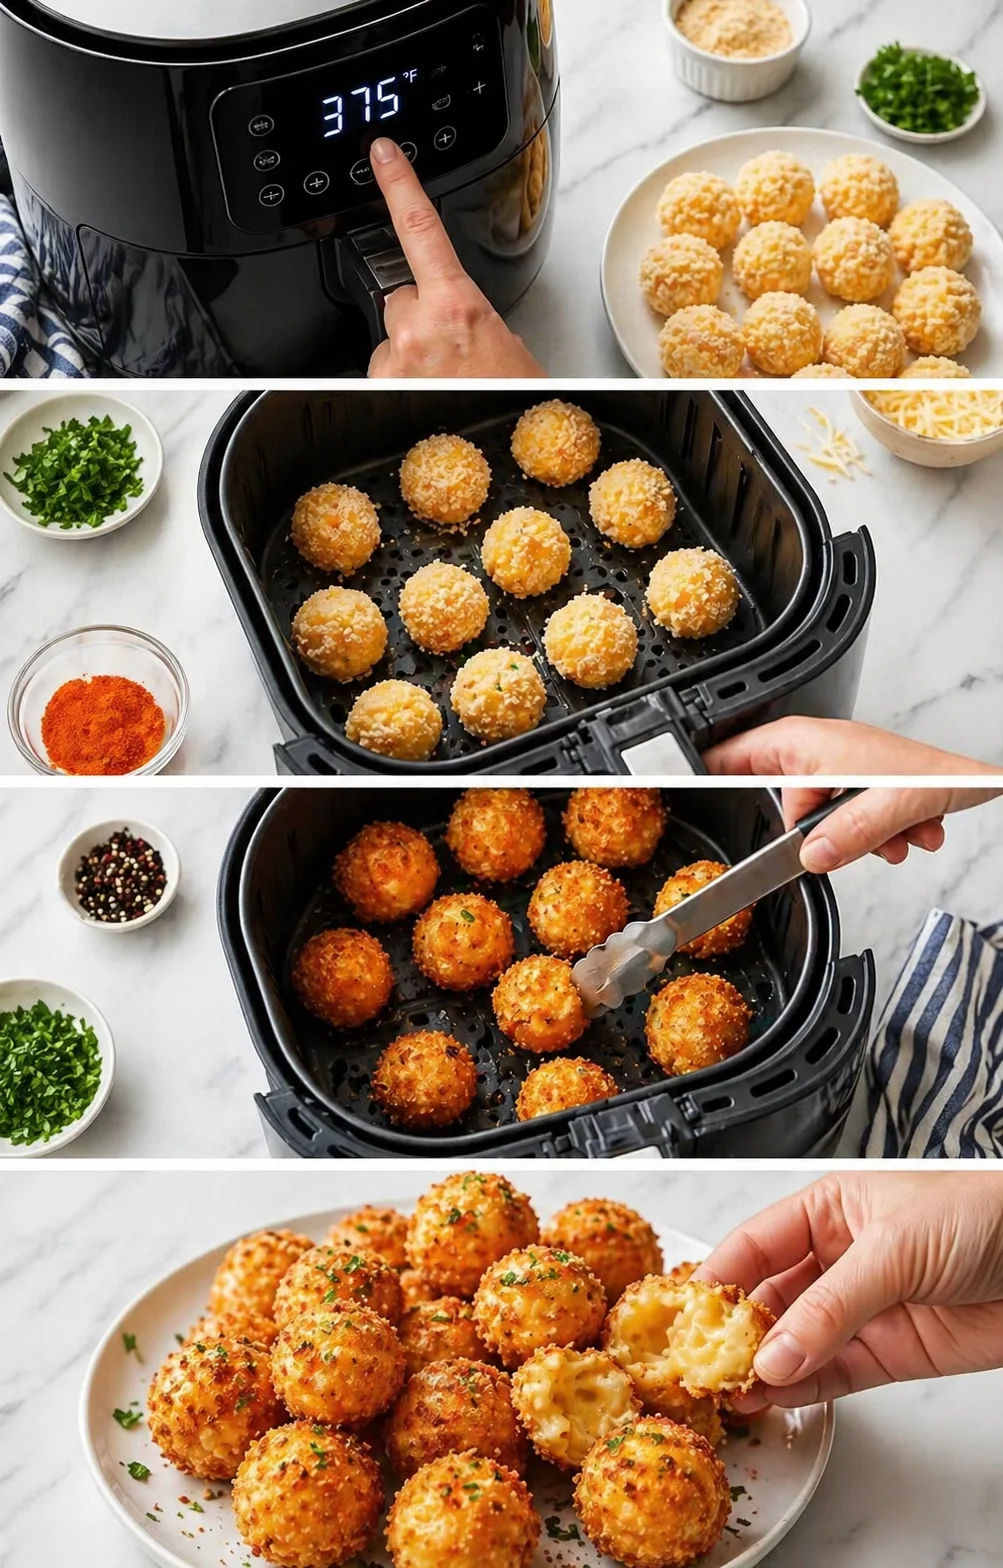
- Preheat the air fryer to 375°F (190°C).
- Place the balls in a single layer in the air fryer basket without touching.
- Air fry 8–10 minutes, flipping halfway through, until golden and crisp.
-
Remove the mac and cheese balls from the air fryer and let them cool a few minutes before eating.
Expert Tips for Perfect Results
- Make sure your macaroni is fully cooked but still firm (al dente) so it doesn’t turn mushy when fried.
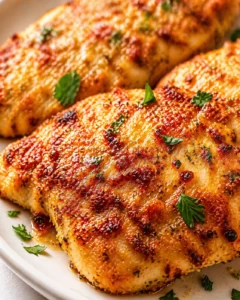
- For an extra flavor kick, sprinkle some cayenne pepper or smoked paprika right into your breadcrumb coating—much like the seasoned crust on this crispy Air Fryer Parmesan-Crusted Chicken.
- Let your mac and cheese mixture cool completely before shaping to help the balls hold together better.
- You can prepare the balls ahead of time and keep them chilled in the fridge; this makes the breading and frying easier.
- If you want them extra crispy, give the balls a light spray of oil halfway through air frying; it’s the same trick that makes these Air Fryer Crispy Mini Blooming Onions so shatter-crisp.
Variations and Serving Ideas
Dip in a Zesty Marinara Sauce
There’s nothing quite like the combo of gooey mac and cheese with a tangy marinara dip. Whether you make your own sauce or grab one at the store, that bright tomato flavor perfectly cuts through the richness of the cheese balls. Try dunking or drizzling to see which you prefer!
Balance with a Fresh Green Salad
When you want to lighten things up, a crisp green salad is the way to go—try a crunchy cucumber ranch salad for cool contrast. Toss some arugula, spinach, or mixed greens in a fresh lemon vinaigrette to add brightness and crunch, balancing all that cheesy comfort.
Spicy Ranch for a Flavor Punch
If you love a little heat, spicy ranch dressing is your best friend here. Creamy, cooling ranch with a hint of kick pairs beautifully with the savory cheese balls to make each bite even more exciting.
Pick any of these serving ideas to elevate your mac and cheese balls and make your snack or meal that much more memorable and delicious. To turn it into a fuller meal, add air fryer lemon chicken bites on the side.
Store, Reheat, and Make Ahead
If you’re lucky enough to have leftovers—though I won’t blame you if you don’t!—here’s how to keep them tasting fresh and crispy.
First, be sure the macaroni and cheese balls have completely cooled before storing. This step is crucial because warm balls will trap moisture and get soggy. Once cooled, store them in an airtight container lined with paper towels to soak up any extra moisture. This keeps them nicely crisp for a few days in the fridge. Plan to eat them within 2-3 days for best results. For another make-ahead option that keeps well in the fridge, try this high-protein chicken bacon ranch pasta meal prep.
Want to save them longer? Freeze them! Arrange the balls on a baking sheet in a single layer and freeze for 1 to 2 hours until firm. Then, transfer them to a freezer-safe bag or container. When ready to enjoy, pop them back into your air fryer at 375°F (190°C) for 5 to 7 minutes to restore that fresh-made crispiness. It’s almost like you made them from scratch all over again.
If reheating from the fridge, oven or air fryer are your best bets. Heat your oven to 350°F (175°C) and bake for 8 to 10 minutes or air fry similarly until they’re hot and crunchy. Avoid the microwave since it softens the crust, and we don’t want that!
Answers to Common Questions
Let’s answer some common questions about these air fryer fried macaroni and cheese balls so you feel totally confident making them!
-
Q: Can I bake these instead of using an air fryer?
A: Absolutely! Just arrange the breaded balls on a parchment-lined baking sheet in a single layer. Preheat your oven to 375°F (190°C) and bake until they’re golden and crispy, flipping once during baking. This usually takes about 12 to 15 minutes depending on your oven and the size of your balls.
-
Q: My mac and cheese balls fall apart while coating or cooking. What can I do?
A: Make sure your mac and cheese mixture is fully cooled and chilled if possible before shaping. Pack the mixture tightly when you form the balls, use the egg wash to help the crumbs stick, and refrigerate the shaped balls for 15 to 30 minutes before breading if needed. Adding a bit more cheese or an extra beaten egg can also help everything bind better.
-
Q: Can I make these ahead of time or freeze them?
A: Yes! After shaping and breading, freeze the balls in a single layer on a baking sheet until firm (about 1–2 hours). Then transfer to a freezer-safe bag or container. When you’re ready, reheat them straight from frozen in the air fryer at 375°F (190°C) for 5–7 minutes until crispy and hot.
-
Q: What are good dipping sauces to serve with them?
A: Classic zesty marinara, spicy ranch, ketchup, barbecue sauce, or a bang bang–style dipping sauce are all great options. You can also serve them alongside a bright side like this street corn salad with Greek yogurt to lighten things up.
-
Q: Can I use different cheeses?
A: Of course! Cheddar, Monterey Jack, fontina, or blends work well. Just aim for cheeses that melt well for gooeyness plus something sharp like Parmesan for flavor balance.
-
Q: How do I reheat leftovers to keep the crispiness?
A: Reheat in the air fryer at 375°F (190°C) for a few minutes until hot and crisp, or bake in the oven at 350°F (175°C) for 8–10 minutes. Avoid microwaving if you want to keep that crunchy exterior.
-
Q: Can I make these gluten-free or egg-free?
A: For gluten-free, swap in gluten-free pasta and breadcrumbs or crushed gluten-free cereal for the coating. For egg-free, try using a neutral liquid binder like aquafaba or a commercial egg replacer, though texture and coating adhesion may be a bit different.
-
Q: How many macaroni and cheese balls does this recipe make?
A: Depending on the size you shape, this recipe yields about 8 to 12 bite-sized balls. Feel free to double or triple the ingredients if you need more!
Crispy golden air-fried macaroni and cheese balls with a creamy, gooey cheese center. A lighter, crunchy snack or appetizer inspired by The Cheesecake Factory, perfect for parties and comfort food lovers.
- Prep Time: 30 minutes
- Cook Time: 10 minutes
- Total Time: 40 minutes
- Yield: 8 to 12 medium-sized balls 1x
- Category: Appetizer
- Cuisine: American
Ingredients
- 1 cup elbow macaroni
- 2 tablespoons butter
- 2 tablespoons all-purpose flour
- 1 1/4 cups milk
- 1/2 teaspoon garlic powder
- 1/2 teaspoon onion powder
- 1/2 teaspoon salt
- 1/4 teaspoon black pepper
- 1 1/2 cups shredded mozzarella cheese
- 1/2 cup grated Parmesan cheese
- 1 large egg
- 1/2 cup bread crumbs
- 1/2 cup panko bread crumbs
- 1/4 cup all-purpose flour
- Vegetable oil for spraying
Instructions
- Cook elbow macaroni according to package directions until al dente; drain and set aside.
- Melt butter in a medium saucepan over medium heat until bubbly.
- Sprinkle in 2 tablespoons all-purpose flour and whisk continuously for 1–2 minutes to form a roux.
- Slowly add 1 1/4 cups milk gradually while whisking constantly to prevent lumps.
- Stir in garlic powder, onion powder, salt, and black pepper until evenly blended.
- Let the sauce gently simmer for 3–4 minutes until slightly thickened.
- Stir in shredded mozzarella cheese and grated Parmesan cheese until fully melted and smooth.
- Remove pan from heat and fold in the cooked elbow macaroni until evenly coated.
- Let the macaroni and cheese mixture cool for 15–20 minutes to firm up for shaping.
- Scoop small portions of the mixture and roll into balls by hand.
- Place the formed balls on a parchment-lined baking sheet or a clean plate.
- Beat the large egg in a shallow bowl.
- Combine bread crumbs and panko bread crumbs in another shallow dish.
- Dip each macaroni ball in the beaten egg, then dredge thoroughly in the breadcrumb mixture, pressing gently to adhere.
- Arrange the breaded balls on the lined baking sheet, spaced apart.
- Lightly spray each ball with vegetable oil.
- Preheat air fryer to 375°F (190°C).
- Place balls in a single layer in air fryer basket without touching.
- Air fry for 8–10 minutes, flipping halfway through, until golden and crisp.
- Remove from air fryer and let cool a few minutes before serving.
Notes
Ensure macaroni is cooked al dente to avoid mushy texture., Add cayenne pepper or smoked paprika to breadcrumb coating for extra flavor., Cool mac and cheese mixture completely before shaping for best results., Optionally spray the balls with oil halfway through air frying for extra crispiness., The balls can be prepared ahead and chilled before breading and frying., Leftovers store well in the fridge up to 2-3 days; keep in an airtight container with paper towels to absorb moisture., To freeze, freeze shaped balls in a single layer until firm, then transfer to a freezer-safe bag or container., Reheat air fryer frozen balls at 375°F (190°C) for 5-7 minutes until crispy and hot., Avoid microwaving leftovers to maintain crispiness., Baking alternative: Bake at 375°F (190°C) for 12-15 minutes, flipping once, until golden and crisp., Cheese variations like cheddar, Monterey Jack, or fontina can be used for different flavor profiles.
Nutrition
- Serving Size: 1 mac and cheese ball
- Calories: Approximately 120 calories per ball (estimate)
- Fat: 7 grams per serving (estimate)
- Carbohydrates: 12 grams per serving (estimate)
- Protein: 6 grams per serving (estimate)