Samoas Cookie Pie
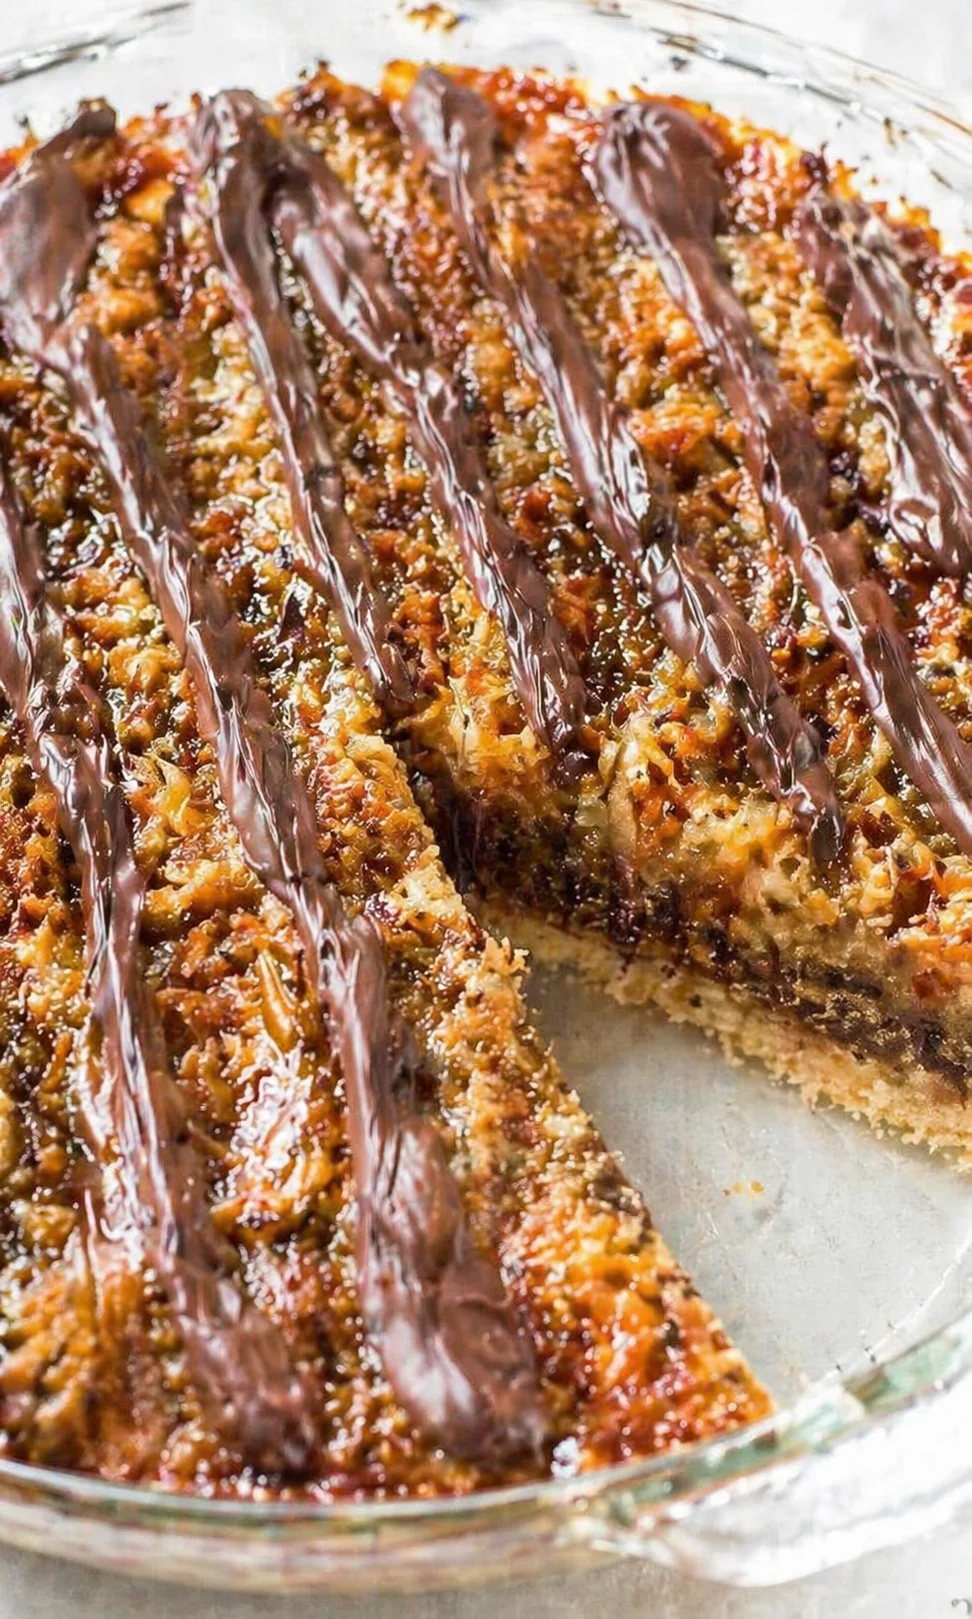
Do you remember the classic Girl Scout Samoas cookies? This Samoa Cookie Pie is your shortcut to all those caramel, chocolate, and coconut flavors rolled into one big, deliciously easy pie. Forget dipping or shaping dozens of cookies; this pie gives you all the nostalgia with way less fuss.
The base comes together in about 10 minutes with just a quick stir—no mixer needed. Then you layer chocolate chips, shredded coconut, sweetened condensed milk, and a drizzle of salted caramel before popping it back in the oven briefly. After it chills and sets, you slice into soft, chewy, gooey perfection that tastes just like your favorite Samoas cookies, only in pie form.
- Super quick and simple: stir, bake, layer, bake again, and chill — minimal effort and maximum flavor.
- Flexible ingredients: use homemade or store-bought caramel, swap in different chocolate types, or turn it into bars if you prefer.
-
Give yourself some time: this pie needs at least 4 hours or overnight chilling to firm up nicely before serving.
All the Flavors You Love
This Samoa Cookie Pie brings all the flavors of traditional Girl Scout Samoas into one big, easy-to-make dessert. The chocolate, caramel, and coconut layers come together over a soft and chewy cookie crust for a nostalgic treat that’s simple enough for any weeknight baking.
- It tastes just like a giant Samoa cookie, but you skip all the dipping and assembling of individual cookies.
- The crust is stir-together and the layering is quick — no mixer or fancy tools required.
- You get a delightful mix of textures — chewy base, gooey caramel-filled layers, melty chocolate, and toasted coconut.
- Use whatever caramel and chocolate you love — swap in your favorites easily.
- Perfect for making ahead: it sets well and stays great at room temperature or freezer-stored for longer.
Ingredients You’ll Need
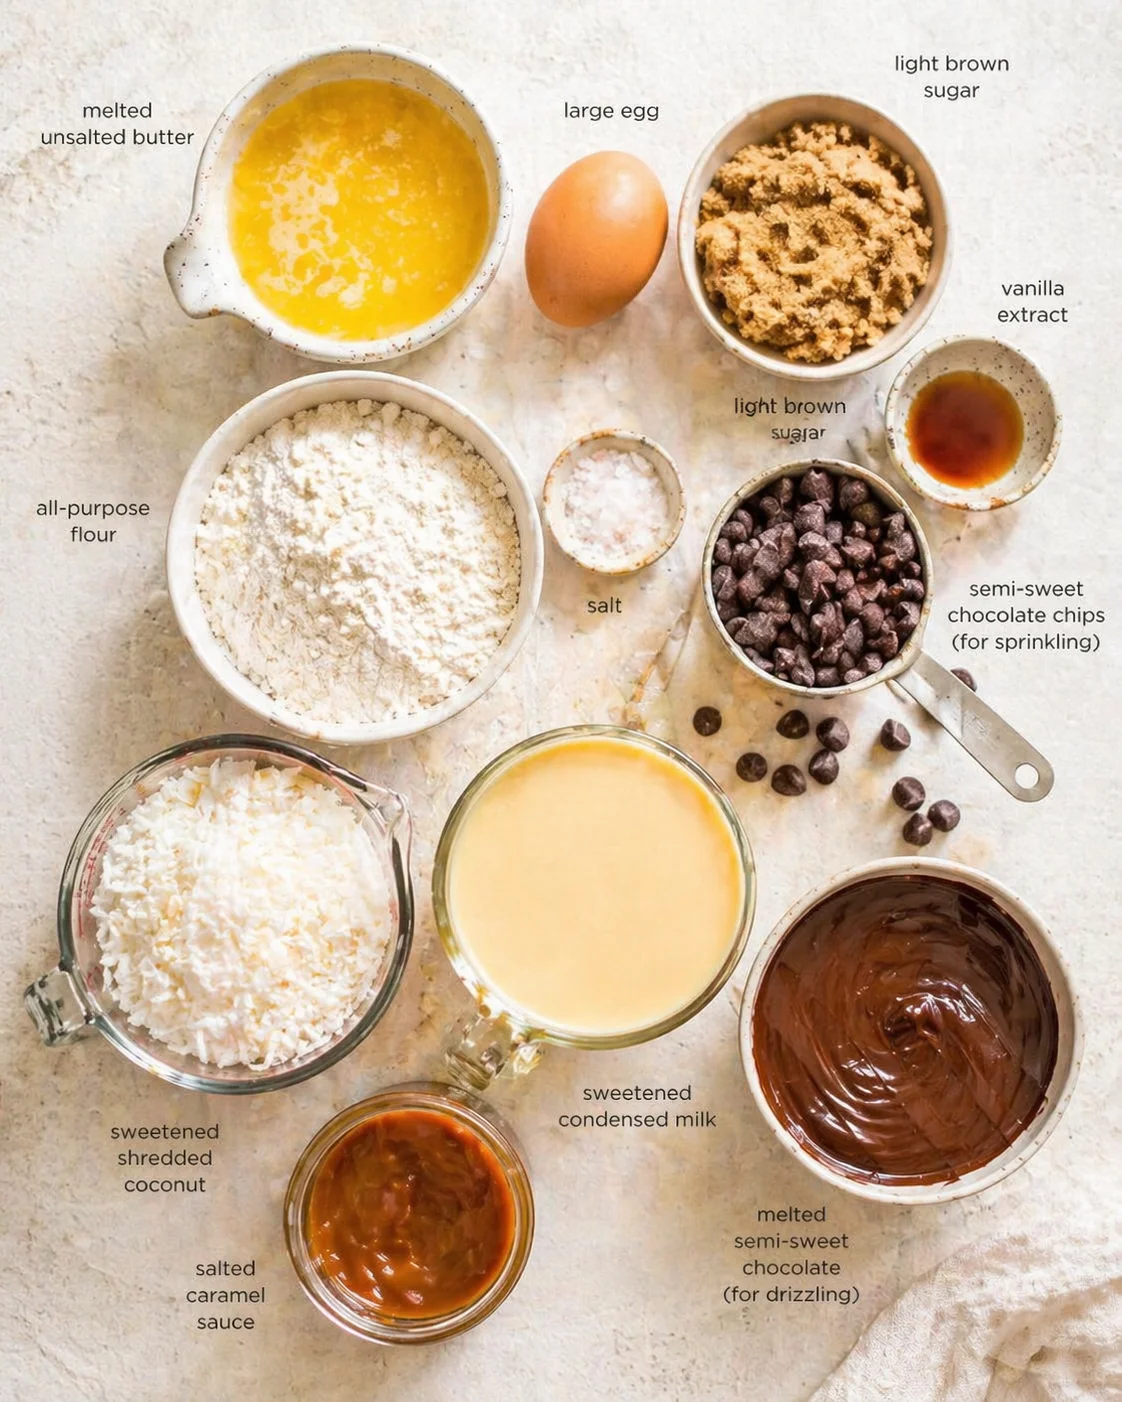
- ½ cup unsalted butter, 1 stick, melted
- 1 large egg
- ½ cup light brown sugar, packed
- 1 teaspoon vanilla extract
- 1 ¼ cups all-purpose flour
- ¼ teaspoon salt, or to taste
- ¾ cup semi-sweet chocolate chips, for sprinkling
- 1 ½ cups sweetened shredded coconut, loosely laid in measuring cup (not packed)
- two-thirds of one 14-ounce can sweetened condensed milk, about 10 ounces
- 4 to 5 ounces salted caramel sauce, homemade or store-bought, regular caramel sauce may be substituted
- ¾ cup semi-sweet chocolate chips, melted for drizzling
Bake and Assemble the Pie
- Preheat oven to 350°F and generously spray a 9-inch pie dish with cooking spray.
- Melt 1/2 cup (1 stick) unsalted butter in a large microwave-safe bowl about 1 minute on high.
- Let the butter cool slightly, then add 1 large egg, 1/2 cup packed light brown sugar, and 1 teaspoon vanilla; whisk until smooth.
-
Add 1 1/4 cups all-purpose flour and 1/4 teaspoon salt; gently stir until just combined.
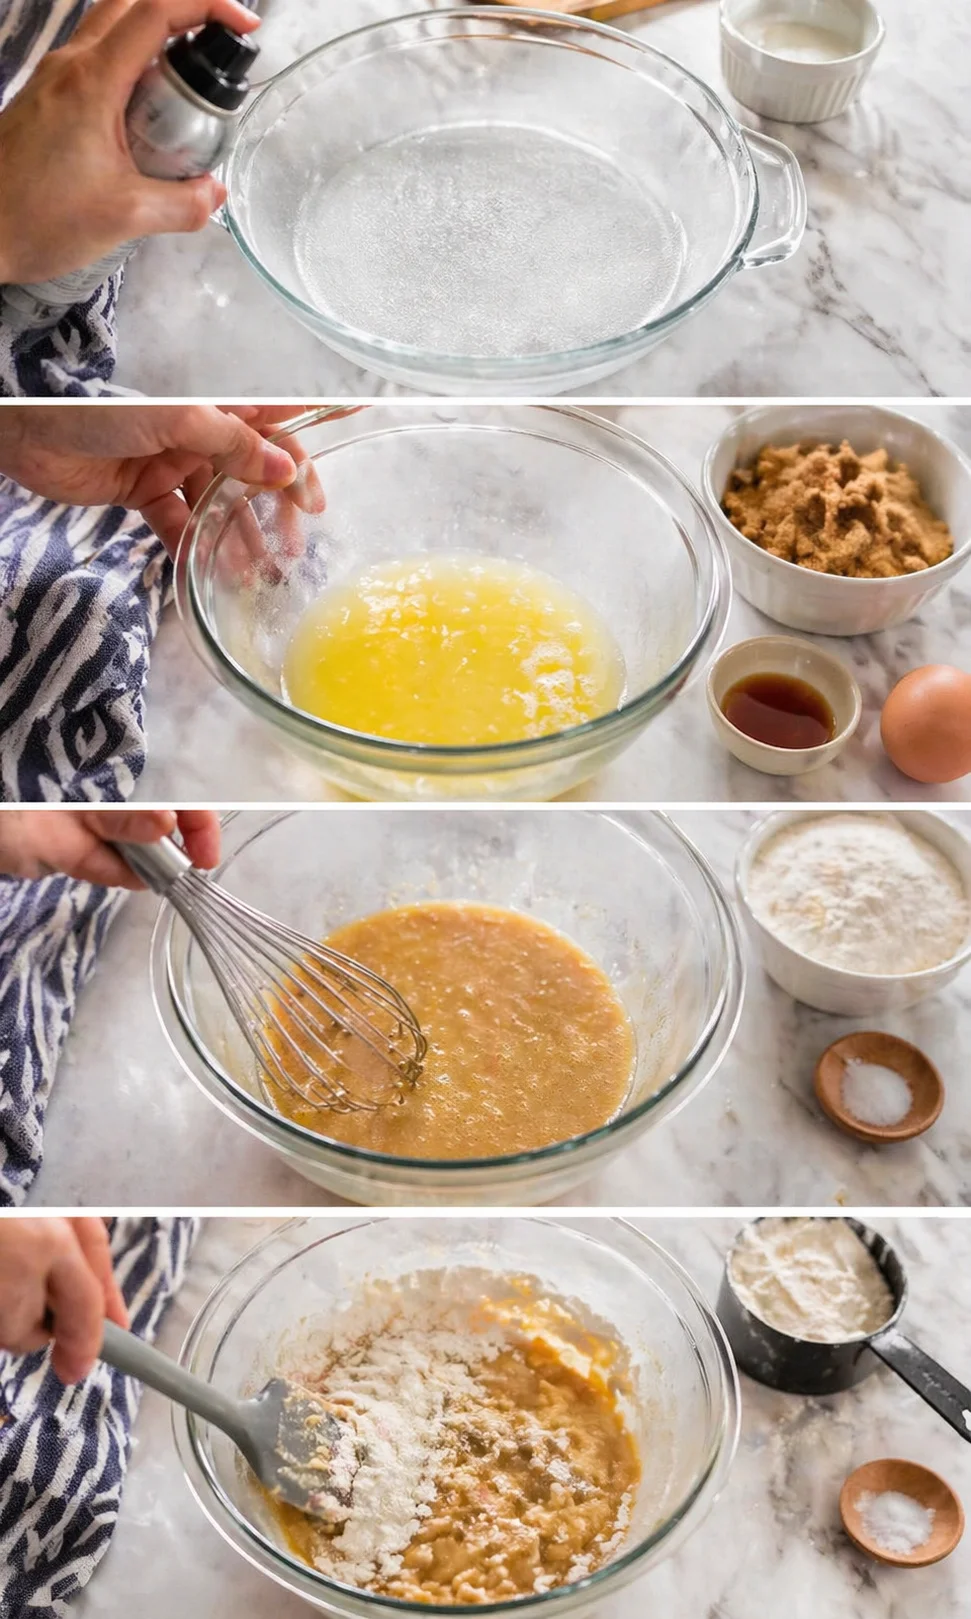
- Pour the dough into the prepared pie dish and smooth the top lightly with a spatula.
- Bake the crust 10–12 minutes until the edges are just starting to firm and the center begins to set.
- Remove the pie from the oven and evenly sprinkle 3/4 cup semi-sweet chocolate chips over the crust.
-
Top the chocolate chips with 1 1/2 cups sweetened shredded coconut, spreading evenly.
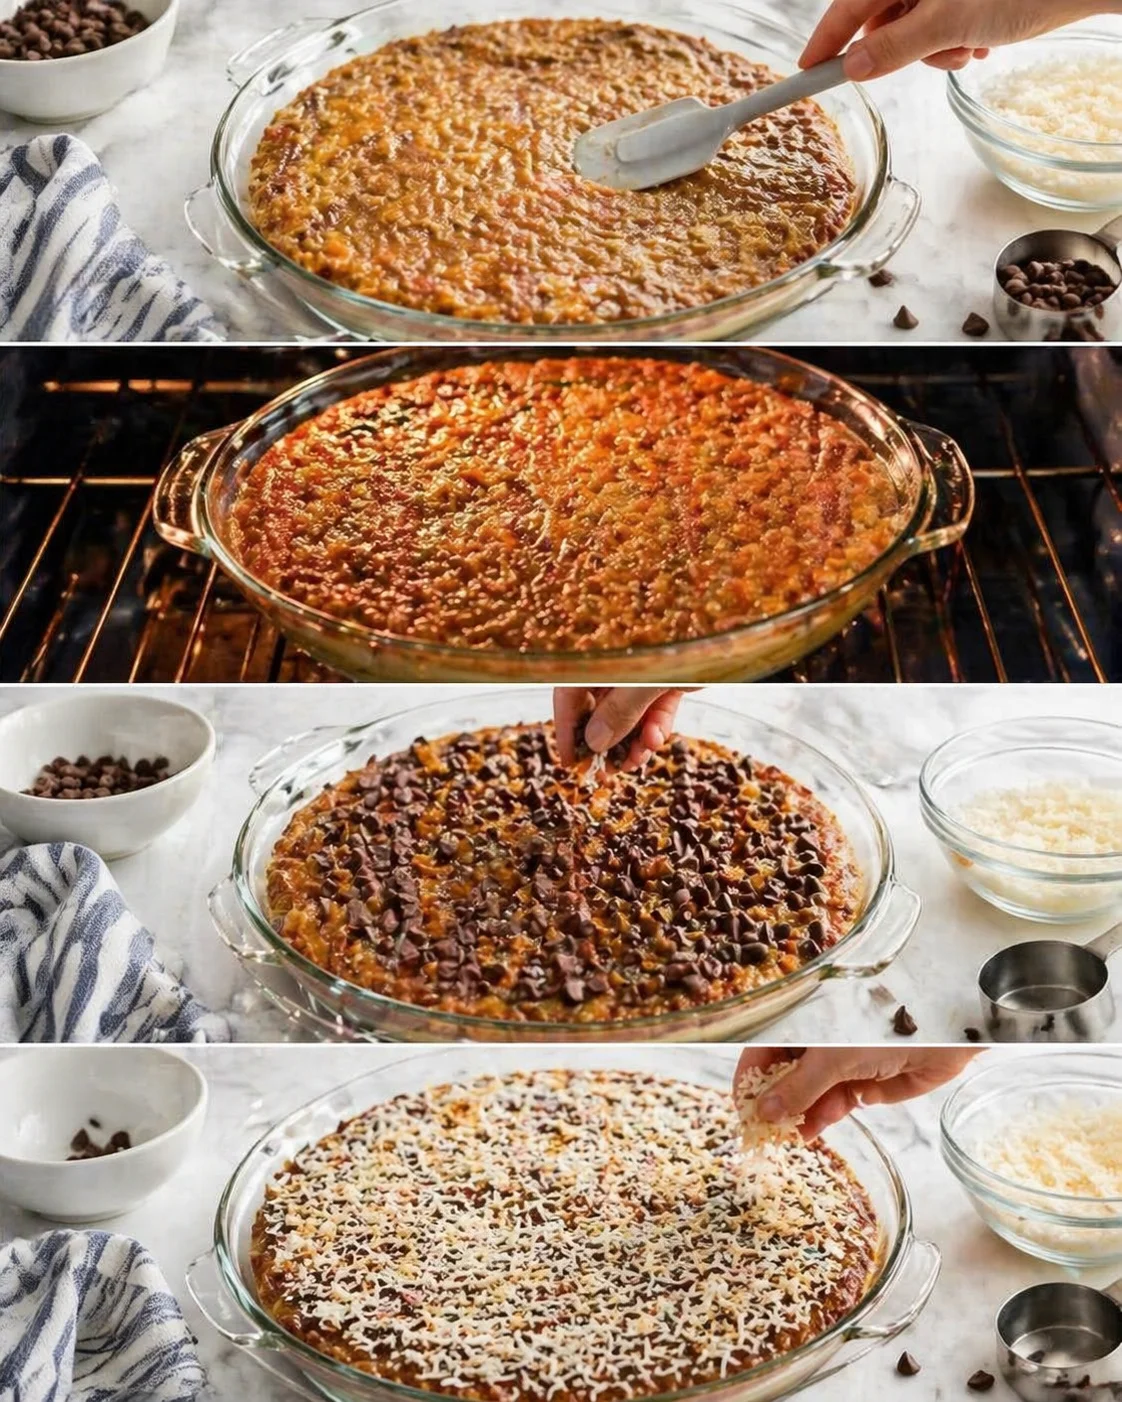
- Drizzle about two-thirds of a 14-ounce can (≈10 ounces) sweetened condensed milk over the coconut.
- Drizzle 4–5 ounces salted caramel sauce evenly over the top.
- Return the pie to the oven and bake about 25 minutes until bubbling at the edges and the center looks set, watching closely during the last 10 minutes to avoid burning.
-
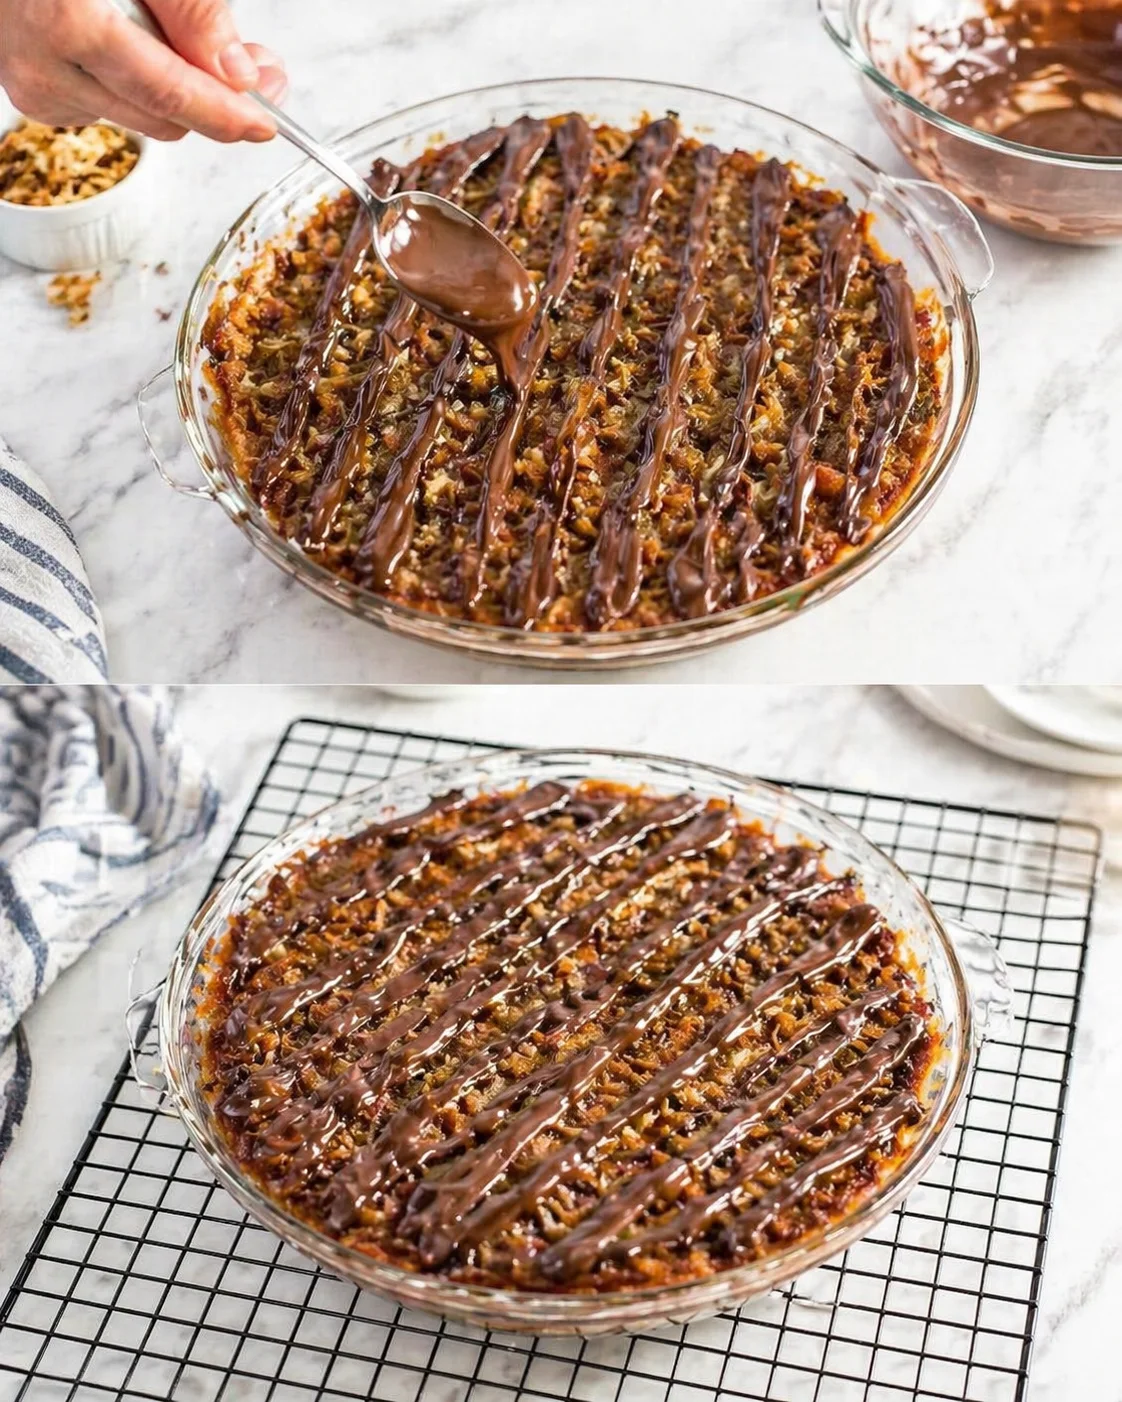
While the pie cools for a few minutes on a wire rack, melt the remaining 3/4 cup chocolate chips in a small microwave-safe bowl in 10-second increments, stirring frequently until smooth.
- Drizzle the melted chocolate across the pie in parallel vertical lines using a spoon or a piping/zip-top bag.
-
Let the pie finish cooling and set on a wire rack for at least 4 hours or overnight before slicing.
Baker’s Tips and Tricks
You’ll use about two-thirds of a 14-ounce can of sweetened condensed milk—roughly 10 ounces. It’s pretty thick and sticky, so just eyeball it. Bonus: save the leftover condensed milk for your coffee, no-bake treats (try these 10-minute chocolate no-bake cookies), or just eat it by the spoonful (no judgment here!).
Keep a close eye on the pie during the last 10 minutes of baking. Coconut, caramel, and condensed milk can burn fast if you’re not careful, so it’s better to pull it out a bit early rather than overbake.
And this next tip is serious: don’t slice the pie right away. It needs 4 hours or overnight in the fridge to firm up properly. Cutting it too soon will make your pie a gooey disaster instead of neat slices—trust me, patience pays off.
Easy Swaps and Add-Ins

- If you don’t have salted caramel on hand, regular caramel sauce works just fine. Salted caramel just adds a nice contrast that balances the sweetness beautifully.
- Feel free to change up your chocolate: dark chocolate gives a richer, less-sweet note, milk chocolate makes it sweeter, or try chopped chocolate instead of chips for bigger melty pockets.
- Toast the coconut before using for a nutty, deep flavor. Just spread the shredded coconut on a baking sheet and toast for a few minutes until golden brown—watch it closely so it doesn’t burn!
- Want it less sweet? Use unsweetened shredded coconut and/or cut back a little on the sweetened condensed milk.
- Not into pies? Make this recipe as bars in an 8×8 or 9×13-inch pan (see these Rhubarb Bars with Cream Cheese for a visual reference on bar thickness and doneness). Just keep an eye on the baking time — the thickness changes the bake, so watch for bubbling edges and a set center.
- To boost texture and flavor, sprinkle flaky sea salt over the chocolate drizzle, add chopped toasted pecans for crunch, or mix a splash of coconut extract into the cookie base.
- Need a gluten-free option? Swap the regular flour for a 1:1 gluten-free flour blend and follow the blend’s directions for best results.
- If you want your pie slices to look more like traditional Samoa cookies, dip the bottoms of your slices in melted chocolate (the quick method in Frozen Chocolate Covered Strawberry Bites works great) once the pie has fully set and cooled.
How to Store and Freeze
This Samoa cookie pie stays delicious for up to 5 days at room temperature if you keep it covered in an airtight container. For longer storage, slice it into small wedges, wrap each piece tightly in plastic wrap, then place the wrapped slices in a large zip-top bag and freeze for up to 6 months. Let the slices thaw at room temperature before serving, and enjoy that Samoa flavor all year round!

Common Questions Answered
Wondering about the caramel? Yes, both salted and regular caramel sauce will work great in this pie. Use whichever one you have on hand or prefer!

A delicious pie that combines the flavors of Girl Scout Samoas cookies with a soft, chewy cookie crust layered with chocolate, coconut, sweetened condensed milk, and salted caramel sauce, finished with a chocolate drizzle.
- Prep Time: 15 minutes
- Cook Time: 35-40 minutes
- Total Time: 4 hours 50 minutes to overnight (includes chilling)
- Yield: 8-10 servings 1x
- Category: Dessert
Ingredients
- 1/2 cup unsalted butter (1 stick), melted
- 1 large egg
- 1/2 cup light brown sugar, packed
- 1 teaspoon vanilla extract
- 1 1/4 cups all-purpose flour
- 1/4 teaspoon salt, or to taste
- 3/4 cup semi-sweet chocolate chips for sprinkling
- 1 1/2 cups sweetened shredded coconut (loosely measured)
- Approximately 10 ounces (two-thirds of a 14-ounce can) sweetened condensed milk
- 4 to 5 ounces salted caramel sauce (homemade or store-bought; regular caramel sauce may be substituted)
- 3/4 cup semi-sweet chocolate chips, melted for drizzling
Instructions
- Preheat oven to 350°F (175°C) and generously spray a 9-inch pie dish with cooking spray.
- Melt unsalted butter in a large microwave-safe bowl for about 1 minute on high; let cool slightly.
- Add the egg, packed light brown sugar, and vanilla extract to the melted butter and whisk until smooth.
- Add all-purpose flour and salt to the wet ingredients and gently stir until just combined.
- Pour the dough into the prepared pie dish and lightly smooth the top with a spatula.
- Bake the crust for 10–12 minutes until edges are just starting to firm and the center begins to set.
- Remove the pie from the oven and evenly sprinkle 3/4 cup semi-sweet chocolate chips over the crust.
- Evenly spread 1 1/2 cups sweetened shredded coconut over the chocolate chips.
- Drizzle approximately 10 ounces of sweetened condensed milk over the coconut layer.
- Drizzle 4–5 ounces of salted caramel sauce evenly over the top.
- Return the pie to the oven and bake for about 25 minutes until bubbling at the edges and the center looks set, monitoring carefully to avoid burning especially during the last 10 minutes.
- While the pie cools on a wire rack for a few minutes, melt 3/4 cup semi-sweet chocolate chips in 10-second increments in the microwave, stirring frequently until smooth.
- Drizzle the melted chocolate over the pie in parallel vertical lines using a spoon or piping bag.
- Allow the pie to cool and set on a wire rack for at least 4 hours or preferably overnight before slicing.
Notes
Use salted caramel sauce for a balanced sweetness or regular caramel sauce as a substitution., Watch baking closely during the last 10 minutes to prevent burning of coconut, caramel, and condensed milk., Pie needs at least 4 hours or overnight chilling to firm up for clean slicing., Leftover sweetened condensed milk can be used for coffee, no-bake treats, or eaten by the spoonful., Toast shredded coconut before using for a nutty, deep flavor if desired., Chocolate types can be swapped: dark chocolate for a richer less sweet flavor, milk chocolate for sweeter, or chopped chocolate for larger melty pockets., This pie can be made as bars in an 8×8 or 9×13-inch pan; baking time may vary and should be watched closely for bubbling edges and set center., Add-ins include flaky sea salt over chocolate drizzle, toasted chopped pecans, or a splash of coconut extract in the cookie base., For gluten-free option, substitute with a 1:1 gluten-free flour blend and follow blend instructions., To mimic traditional Samoa cookie slices appearance, dip bottoms in melted chocolate after pie has set and cooled., Store covered at room temperature up to 5 days; freeze sliced and wrapped pieces up to 6 months, thaw at room temperature before serving.
Nutrition
- Serving Size: 1 slice
- Calories: Approximately 350-400 calories per serving (estimate based on ingredients)
- Fat: Approx. 18-22 grams per serving
- Carbohydrates: Approx. 50-55 grams per serving
- Protein: Approx. 4-5 grams per serving