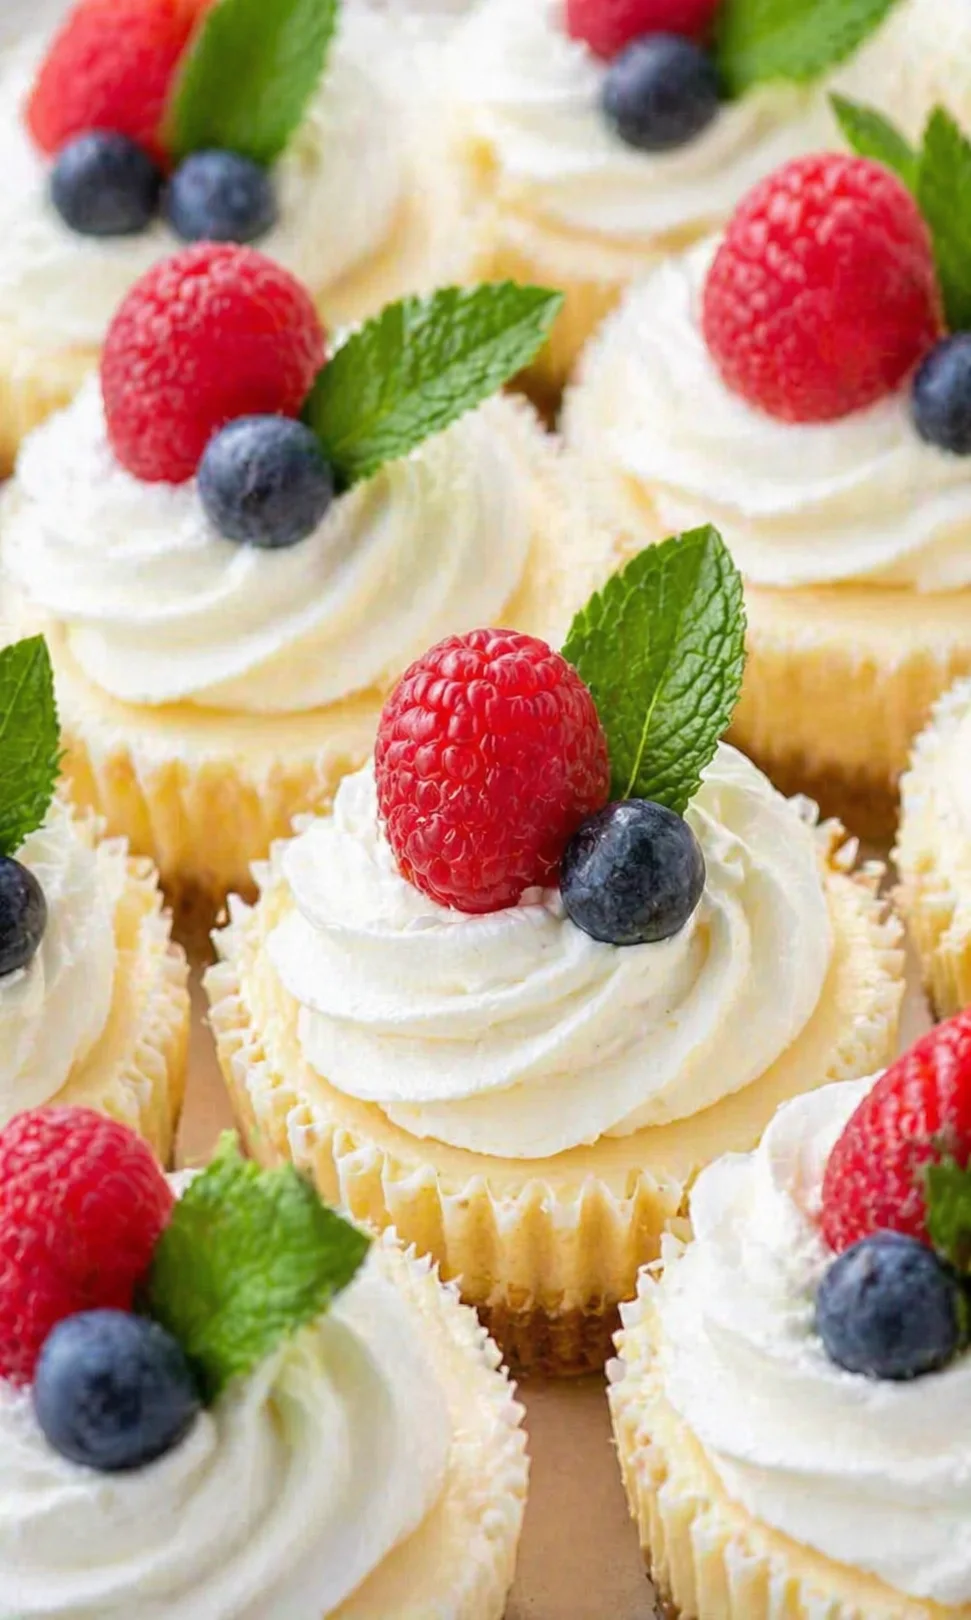
Mini Cheesecake Cups
After testing countless cheesecakes over the years, I can confidently say this mini version is the easiest way to get creamy, bakery-quality results without breaking a sweat. They bake and chill so much faster, which means you can have perfect little cheesecakes on your table in no time. Every step has been carefully fine-tuned to guarantee smooth, crack-free minis. Trust me, this recipe is your go-to for foolproof cheesecakes that will wow your family and friends every single time.
Absolutely delicious! My daughter ADORES cheesecake and devoured these mini treats. She even requested them for her birthday party instead of a traditional cake. Huge thanks!
Mini cheesecakes are the perfect way to dive into cheesecake baking without feeling overwhelmed. They give you everything you love about a classic cheesecake—creamy filling, rich taste, and tons of topping choices—all while cutting your baking and chilling time way down. Because they bake quicker and chill faster, they’re ready to enjoy in about a third of the time a full-size cheesecake takes. Say goodbye to water baths and all-day waits, and hello to a stress-free, bakery-worthy sweet treat.
Having tested cheesecake recipes for years, I’ve combined my best tips and tricks into this simple, bulletproof method. From picking the right cream cheese to getting the perfect crust-to-filling ratio, this recipe is designed so you nail it on your first try. I’ve also experimented with different mixing techniques and baking times to ensure these minis turn out perfectly smooth and without a single crack—no guesswork needed!
What excites me most is how adaptable these mini cheesecakes are. Think of them as a blank canvas ready for your creativity! You can top them with fresh fruit, chocolate, caramel, or whipped cream and make each batch just right for any gathering or season. And since this method has been tested inside and out, you can bake with confidence knowing your results will always be consistently delicious.
If cheesecake feels intimidating or you’re just short on time, these mini cheesecakes are your shortcut to that perfect bakery-quality dessert. This recipe brings together everything I’ve learned from testing cheesecakes over the years into a straightforward, reliable process: no water bath, no fancy equipment, and clear, simple steps to stop cracks and sinking in their tracks.
Keep reading for a quick, easy step-by-step guide packed with pro tips for a smooth, creamy cheesecake filling, a tender graham cracker crust, and fast bake-and-chill timing. I’ll also share ideas for toppings, variations to switch things up, and advice on making these ahead or freezing them so you can customize for any occasion.
- Yield: 12 mini cheesecakes
- Bake time: 15–17 minutes; chill at least 4 hours
- Equipment you’ll need: standard muffin pan, paper liners, and a hand or stand mixer
Reasons to Make Them
- Perfect for feeding a crowd
- Easy to make ahead and freeze
- Endless topping options to customize (try a spoonful of homemade rhubarb pie filling)
-
Faster and simpler than making a big cheesecake
What You Need

- 1 cup (113g) graham cracker crumbs
- 4 Tbsp unsalted butter, melted
- 16 oz full fat cream cheese, softened to room temperature
- ½ cup (99g) granulated sugar
- 1 tsp vanilla extract
- 2 large eggs
- whipped cream
- fresh fruit
Baking, Assembly, and Cooling
- Bring cream cheese and eggs to room temperature.
- Preheat oven to 350ºF and line a standard muffin pan with paper liners.
- Melt the unsalted butter gently.
-
Combine graham cracker crumbs and melted butter until the mixture resembles coarse sand.
- Press 1 to 2 tablespoons of the crumb mixture into each muffin cup, using the bottom of a 1/3 cup measure (or similar) to press and flatten evenly.
-
Bake the crusts for 5 minutes, then set aside to cool while you make the filling.
- Beat cream cheese and sugar with an electric mixer until very smooth, about 1–2 minutes.
-
Add vanilla, then add the eggs and mix just enough to break the yolks.
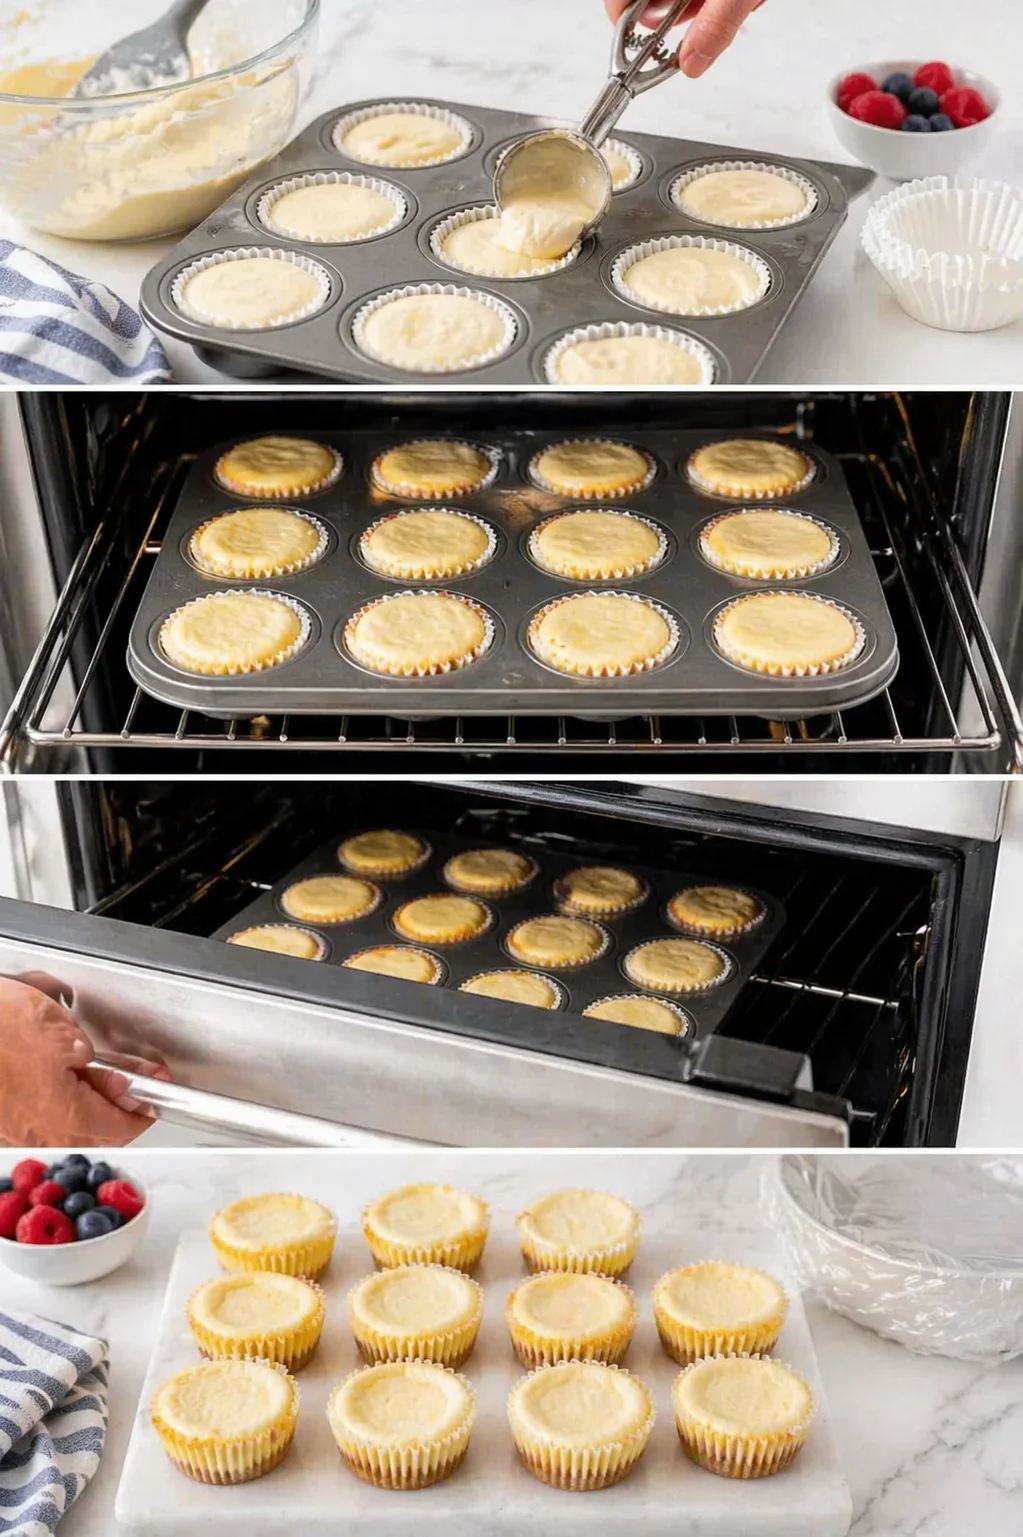
- Spoon or scoop the batter evenly into the muffin liners, filling each one full.
- Bake for 15–17 minutes, until the centers wobble slightly but are not liquidy.
- Turn off the oven, crack the door open, and let the cheesecakes sit inside 15–20 minutes to cool slowly.
-
Remove to the counter to cool fully, then refrigerate for at least 4 hours (or chill overnight, loosely covered) to set.
-
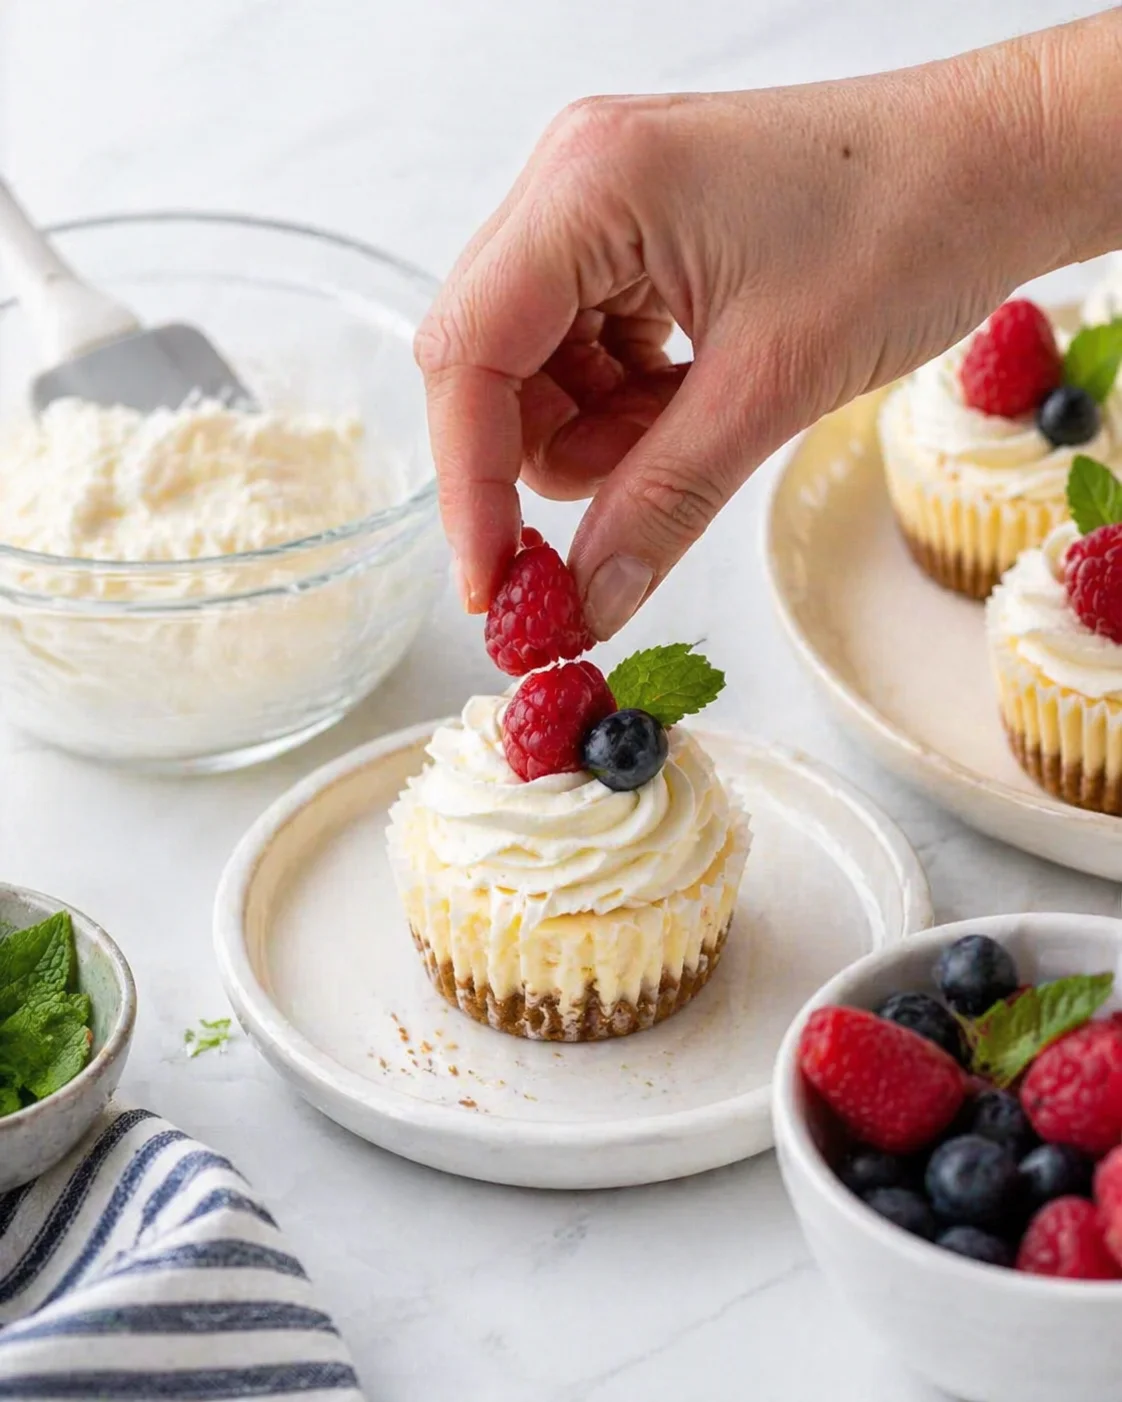
Add whipped cream, fresh fruit, or chocolate ganache just before serving.
Pro Tips for Flawless Minis
- Use a standard-sized muffin pan
- Line pans with paper muffin or cupcake liners
Making mini cheesecakes in a muffin pan is a fantastic way to shrink a classic recipe into perfect individual portions. No need for a water bath or fancy equipment, and they bake way faster than a big cheesecake. Prefer to skip the oven entirely? Try these Easy 10 Minute Chocolate No Bake Cookies for a fast, no-bake treat.
Mini cheesecakes are much less fussy than the traditional big ones, so if it’s your first time making cheesecake, this is a great way to start. If you’d like another beginner-friendly cream cheese dessert, try these Rhubarb Bars with Cream Cheese. Here are some easy tips to make sure yours turn out perfect.
- Mix eggs gently. After adding eggs, stir just enough to break the yolks. Over-mixing introduces air that causes bubbles and cracks.
- Don’t overbake. The center should jiggle slightly when you gently shake the pan. If it wobbles like liquid, bake a bit longer.
- Allow plenty of chill time. Warm cheesecake isn’t very appetizing, so plan enough time to chill them properly.
- Have a backup plan. If you see cracks or bubbles on top, no worries—toppings like fruit or whipped cream will hide those imperfections beautifully.
How do you keep Mini Cheesecakes from sinking in the middle?
If your mini cheesecakes sink in the middle, it’s usually because the batter was overmixed, especially after adding the eggs. When you beat too much air into the batter, it expands while baking then collapses as it cools, leaving you with sunken centers.
Cheesecakes also dislike sudden temperature changes. Taking them quickly from the hot oven to a cold room causes the centers to drop.
Fix it: After baking, turn off the oven and crack the door open. Let your mini cheesecakes sit inside for 15–20 minutes to cool slowly. Then remove them to the counter to cool fully before popping them in the fridge.
Flavor and Topping Ideas
Want to jazz up your mini cheesecakes? Here are some tasty ideas to try:
- Mini chocolate chips or finely chopped dark chocolate (try folding some into the batter for extra chocolate goodness!)
- Fruit pie filling, like cherry or blueberry
- Chopped candy bars for a sweet crunch
- Salted caramel drizzle—or go all-in on a caramel-coconut-chocolate combo inspired by Samoas Cookie Pie
- Fresh seasonal fruit—berries in spring, peaches or nectarines in summer, pomegranate seeds in fall—or channel chocolate-covered-strawberry vibes inspired by Frozen Chocolate Covered Strawberry Bites
- Crushed Oreos for a cookies-and-cream twist
- Candied citrus peels for a bright, tangy kick
- Whipped cream flavors I love: Neapolitan, coffee, or chocolate whipped cream make fun toppings!
If you’re following a keto diet, try swapping in a keto cheesecake recipe for a low-carb twist.
Storing and Freezing
Store leftovers in an airtight container in the fridge for up to a week. While they’ll last a week, I recommend making them no more than 3 to 4 days ahead if you want peak freshness, especially for parties or special events.
How to Freeze Easy Mini Cheesecakes
Mini cheesecakes freeze beautifully for up to 3 months. You can freeze them individually wrapped or stacked in an airtight container with parchment paper between layers to prevent sticking. When you’re ready to enjoy, thaw them overnight in the fridge and add your toppings before serving.
This was my first time making cheesecake, and guess what? I entered it in a baking contest and won first place! The instructions were super simple to follow, and the cheesecake looked amazing.
Common Questions Answered
Can I use the cream cheese that comes in a tub? I don’t recommend it. This recipe works best with full-fat cream cheese in blocks (8-ounce bars). Tub cream cheese has more moisture and a softer texture, which can keep your cheesecake minis from setting properly.
Why did my cheesecakes sink or crack? Usually, it’s from overmixing after adding the eggs or from sudden temperature shifts. Mix the eggs just enough to break the yolks, then cool the cheesecakes slowly by turning off the oven, opening the door slightly, and letting them sit for 15–20 minutes before moving them to the counter. Any small cracks or bubbles will be hidden by toppings.
How do I know when my mini cheesecakes are done? Bake for 15–17 minutes. When you gently shake the pan, the centers should wobble just a bit. If they move like liquid, they need more baking time.
Do I need a water bath? No! The small size and short baking time of mini cheesecakes mean they don’t need a water bath like full-sized ones do. That makes these much easier and faster to bake.
Can I substitute the graham cracker crust? Yes! Oreos or chocolate wafers make a tasty chocolate crust, while vanilla wafers or ginger snaps offer different flavors. You can also skip the crust, though it makes the minis harder to handle by hand.
How do I remove the cheesecakes from the liners? After chilling them fully (at least 4 hours), peel the paper liners off slowly. If the crust sticks, gently run a thin offset spatula or butter knife around the edge to loosen before peeling.
How long can I store or freeze mini cheesecakes? Keep them in an airtight container in the fridge for up to a week. For best taste, I suggest making them 3–4 days before your event. You can freeze them for up to 3 months. Wrap each one individually or layer them with parchment paper in a container. Defrost overnight in the fridge before serving.
Can I bake these mini cheesecakes in a convection oven or air fryer? For convection ovens, lower the temperature by about 25ºF and start checking for doneness a little earlier. Air fryer times vary by model; if you try baking them there, keep a close eye to avoid over-browning and look for slightly jiggly centers just like in a regular oven. For typical air fryer temperatures and browning prevention tips, see the time-and-temp guidance in these Air Fryer Cream Cheese Wontons.
Are there options for dietary restrictions? This recipe includes dairy and eggs. For a keto-friendly option, try a keto cheesecake recipe using low-carb sweeteners and crusts. Vegan or dairy-free versions are possible with plant-based cream cheeses and egg substitutes, but expect some differences in texture and baking time since this version is tested with full-fat, egg-based ingredients.
How many mini cheesecakes does this recipe make? Using a standard muffin pan and paper liners, you’ll get 12 perfectly sized mini cheesecakes.
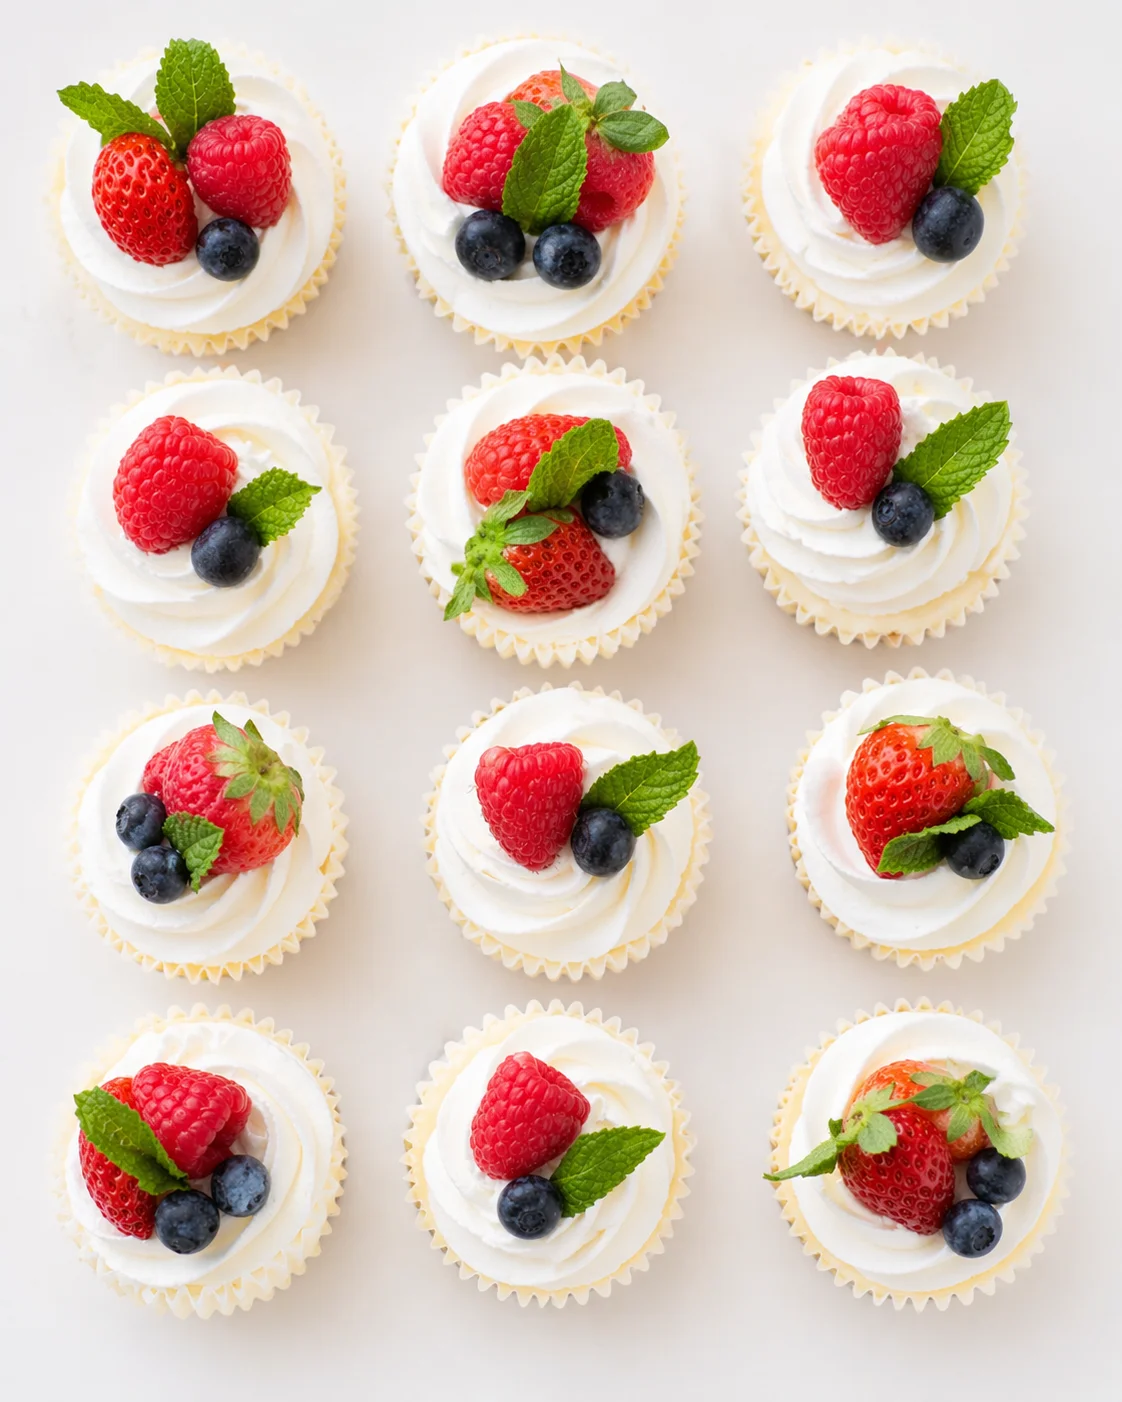
PrintEasy-to-make mini cheesecakes with a graham cracker crust and creamy vanilla filling, topped with whipped cream and fresh fruit. They bake quickly and chill fast for a perfect bakery-quality dessert without a water bath or cracking.
- Prep Time: 15 minutes
- Cook Time: 20-22 minutes
- Total Time: 4 hours 35 minutes to overnight
- Yield: 12 mini cheesecakes 1x
- Category: Dessert
- Cuisine: American
Ingredients
- 1 cup (113g) graham cracker crumbs
- 4 tablespoons unsalted butter, melted
- 16 oz full-fat cream cheese, softened to room temperature
- ½ cup (99g) granulated sugar
- 1 teaspoon vanilla extract
- 2 large eggs
- Whipped cream, for topping
- Fresh fruit, for topping
Instructions
- Bring the cream cheese and eggs to room temperature.
- Preheat oven to 350ºF (175ºC) and line a standard muffin pan with paper liners.
- Melt the unsalted butter gently.
- Combine graham cracker crumbs and melted butter until the mixture resembles coarse sand.
- Press 1 to 2 tablespoons of the crumb mixture into each muffin cup, using the bottom of a 1/3 cup measure (or similar) to press and flatten evenly.
- Bake the crusts for 5 minutes, then set aside to cool.
- Beat cream cheese and sugar with an electric mixer until very smooth, about 1–2 minutes.
- Add vanilla extract, then add the eggs and mix just enough to break the yolks without overmixing.
- Spoon or scoop the batter evenly into the muffin liners, filling each one full.
- Bake for 15 to 17 minutes, until the centers wobble slightly but are not liquidy.
- Turn off the oven, crack the door open, and let the cheesecakes sit inside for 15–20 minutes to cool slowly.
- Remove to the counter to cool fully, then refrigerate for at least 4 hours or chill overnight, loosely covered, to set.
- Add whipped cream and fresh fruit or chocolate ganache just before serving.
Notes
Do not overmix eggs to prevent air bubbles and cracks., Slow cooling in the oven prevents sinking centers., Toppings like fruit or whipped cream can hide small cracks or bubbles., You can substitute crust with Oreos, chocolate wafers, vanilla wafers, or ginger snaps., For convection ovens, lower temperature by 25ºF and monitor baking time., Air fryer baking times vary; watch for slightly jiggly centers to avoid overbaking., Mini cheesecakes freeze well up to 3 months; thaw overnight in the fridge before serving.
Nutrition
- Serving Size: 1 mini cheesecake
- Calories: Approximately 250 calories per mini cheesecake (estimate based on ingredients)
- Fat: 16g per serving (estimate)
- Carbohydrates: 22g per serving (estimate)
- Protein: 5g per serving (estimate)